Blog

  • How to Bypass Android Lockscreen

    How to Bypass Android Lockscreen

    If you’ve forgotten the lockscreen on your Android phone or are having trouble unlocking it, don’t worry! You can bypass the lockscreen with simple and effective methods. This guide will show you how to bypass your Android lockscreen step by step.

    1. Use Google Find My Device


    If you’ve logged into your Google account on your phone, you can unlock your phone using Google Find My Device.

    Steps to Use Google Find My Device:

    • Open the “Find My Device” website on your computer or any other device (https://www.google.com/android/find).
    • Log in with your Google account.
    • Select your locked phone.
    • Click on the “Lock” option.
    • Set a new password that you can use on your lockscreen.
    1. Factory Reset


    If you want to bypass the lockscreen and have a backup of your phone, you can perform a factory reset. Note that this process will erase all your data.

    Steps for Factory Reset:

    • Power off your phone.
    • Press the Volume Up + Power button together to boot the phone into Recovery Mode.
    • Select the Wipe data/factory reset option.
    • Confirm and reset the phone.
    • After the reset, log in with your Google account and set up your phone.
    1. Use ADB (Android Debug Bridge)


    If you’ve enabled USB debugging on your phone, you can bypass the lockscreen using ADB.

    Steps to Use ADB:

    • Install the ADB tool on your computer.
    • Connect your phone to the computer via USB cable.

    Open Command Prompt and type:
    bash
    Copy code
    adb shell rm /data/system/gesture.key

    • Restart your phone.
    • You can now unlock your lockscreen.
    1. Use Third-Party Unlocking Apps


    If you want a simple and safe solution, use third-party unlocking apps to bypass your phone’s lockscreen.

    Recommended Unlocking Apps:

    • Dr.Fone – Screen Unlock
    • iMyFone LockWiper (Android)

    Steps to Use Third-Party App:

    • Download and install the app.
    • Connect your phone and follow the app’s instructions.
    • The app will bypass your lockscreen.
    1. Use Samsung Find My Mobile (For Samsung Users)


    If you have a Samsung phone, you can bypass the lockscreen using Find My Mobile.

    Steps for Samsung Find My Mobile:

    • Open the Find My Mobile website (https://findmymobile.samsung.com).
    • Log in with your Samsung account.
    • Select your locked phone.
    • Click on the Unlock option and bypass your phone’s lockscreen.
    1. Use Smart Lock (If Set Up Earlier)


    If you’ve already enabled the Smart Lock feature, you can unlock your device without a password or PIN.

    Steps to Use Smart Lock:

    • Unlock your phone.
    • Go to Settings > Security > Smart Lock.
    • Choose the option to unlock your phone using Trusted devices or Trusted places.

    FAQs:

    Q1: Can I bypass my Android lockscreen without data loss?

    If your phone has Google Find My Device or Smart Lock enabled, you can unlock your phone without data loss.

    Q2: Will factory reset erase my data?

    Yes, factory reset erases all your data, so you should take a backup first.

    Q3: Are third-party unlocking apps safe?

    Use trusted and verified apps like Dr.Fone or iMyFone LockWiper, which are reliable.

    Q4: Will the ADB method work on every device?

    The ADB method works when your phone is in USB debugging mode and the device is unlockable.

    Conclusion
    You can easily bypass your Android lockscreen by following the methods above. Each method has its own risks and benefits, so choose the one that suits you best. If you encounter any issues, seek help from an expert.
  • How to Combine Videos on Android for Free

    How to Combine Videos on Android for Free

    If you want to combine videos on your Android phone, this guide is perfect for you! You can easily merge videos with free tools and apps. In this step-by-step guide, we will show you how to combine your videos for free without spending any money.

    1. Download a Video Editing App First, download a video editing app on your phone. Several free and excellent apps for Android offer video combining features.

    Best Free Video Editing Apps:

    • InShot – Easy to use with great editing options.
    • Kinemaster – Feature-rich and easy to combine clips.
    • VideoShow – Simple interface with merging capabilities.

    Steps to Download and Install:

    • Open the Google Play Store.
    • Type “InShot,” “Kinemaster,” or “VideoShow” in the search box.
    • Download and install the app.
    1. Select Videos Now, choose the videos you want to combine.

    Steps to Select Videos:

    • Open the app (InShot, Kinemaster, or VideoShow).
    • Select the “New Project” or “Create” option.
    • Pick the videos you want to combine from your phone’s gallery.
    1. Merge Videos Next, merge the selected videos, which is simple.

    Steps to Merge Videos:

    • Drag and drop the video onto the timeline.
    • To merge the videos seamlessly, you can use video transitions (optional).
    • Press the Play button to watch your combined video.
    1. Editing and Enhancements (Optional) You can enhance the combined video by adding music, text, or filters.

    Editing Features:

    • Text – Add text to the video.
    • Music – Add your favorite music.
    • Filters – Apply filters to enhance the video.
    1. Save and Share Once you’ve merged the videos and completed any edits, save your final video.

    Steps to Save and Share:

    • Click the Save button.
    • Save the video in your gallery.

    If you want, you can also share the video directly on WhatsApp, Instagram, or YouTube.

    1. FAQs:

    Q1: Can I combine videos for free? 

    Yes, apps like InShot, Kinemaster, and VideoShow allow you to combine videos for free.

    Q2: Is it difficult to use these apps? 

    No! These apps are user-friendly and provide step-by-step instructions.

    Q3: Can the combined video be saved in high quality? 

    Yes, you can save your combined video in high-quality settings.

    Q4: Are these apps free or paid? 

    The basic versions of these apps are free, but some premium features are available in the paid version.

    Conclusion: You can easily combine videos on your Android phone by following the steps above using these apps. These free apps make it simple to merge videos. Try them today and start combining your videos!

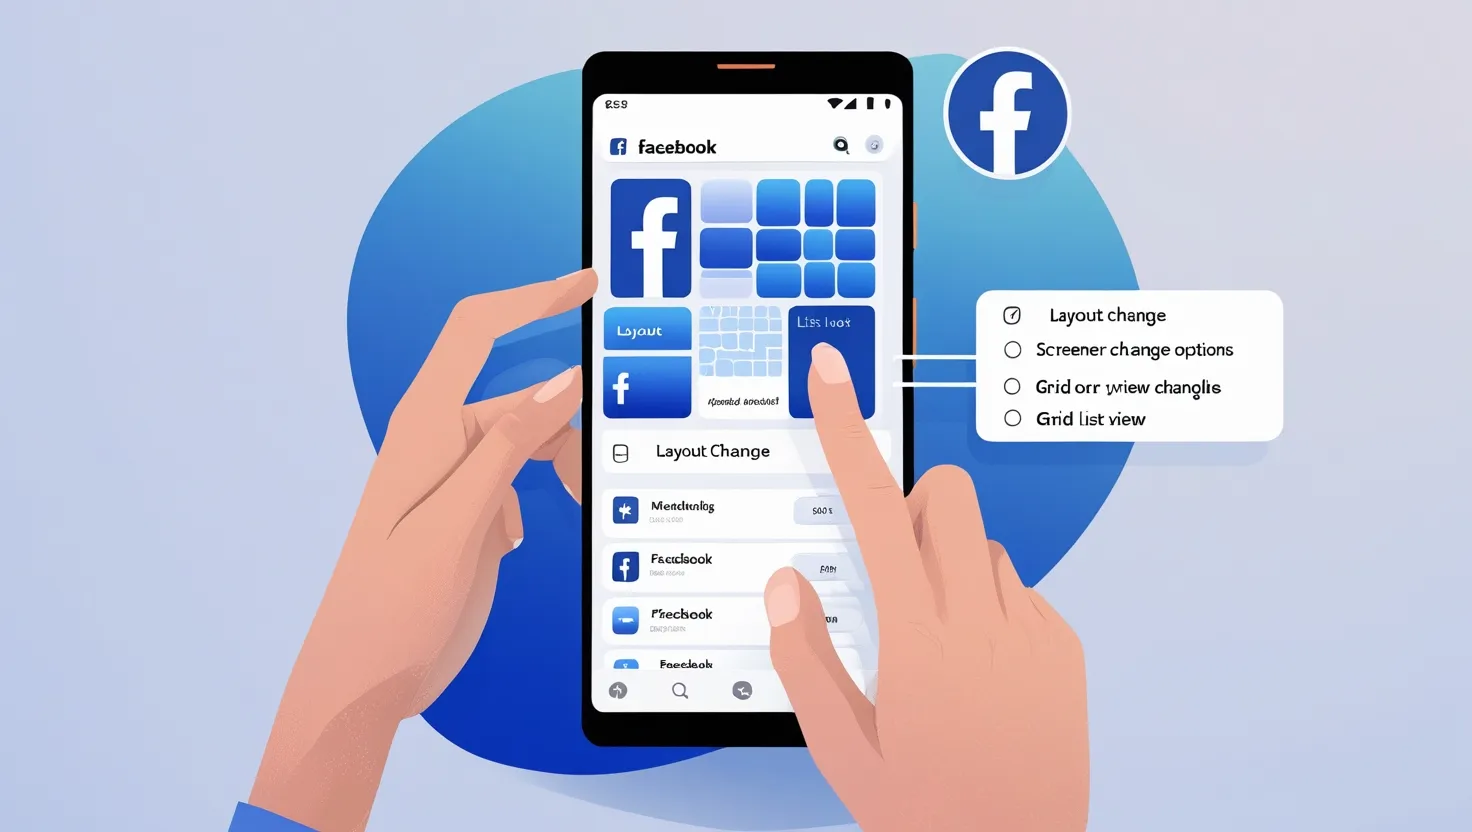
  • How to Change Facebook Layout on Android?

    How to Change Facebook Layout on Android?

    If your Facebook layout seems boring or confusing, don’t worry! Facebook lets you customize its layout, and you can easily do this on Android devices. If you want to change the look and feel of your Facebook, this detailed guide is perfect for you. Here’s a step-by-step process that’s both easy and effective.

    1. Update Your Facebook App

    First, make sure you update your Facebook app. The latest updates bring new layout features and customization options.

    Steps to Update Facebook App:

    • Open the Play Store on your Android device.
    • Type “Facebook” in the search bar.
    • If you see the “Update” option, tap it (if an update is available).
    • Open the app after it updates and explore the new features.

    2. Enable Dark Mode (Optional)

    Enable Facebook’s Dark Mode to give your app a cool, eye-friendly layout, perfect for those who browse at night.

    Steps to Enable Dark Mode:

    • Open the Facebook app.
    • Tap the three lines (≡) in the top-right corner.
    • Go to “Settings & Privacy”.
    • Select “Dark Mode”.
    • Tap “On” to enable Dark Mode.

    3. Built-in Options to Change Layout

    Customize different layout styles using the built-in options in the Facebook app.

    Steps to Customize Layout:

    Change Navigation Bar:

    • Go to “Settings & Privacy”.
    • Tap “Settings”.
    • Select “Navigation Bar” and add or remove your preferred shortcuts.

    Adjust Feed Preferences:

    • Go to “News Feed Preferences” in “Settings”.
    • Prioritize content by choosing “Prioritize Who to See First” to highlight your favorite pages and friends’ content.

    Customize Font Size:

    • Open the phone’s Display settings.
    • Adjust the “Font Size” to make Facebook more readable.

    4. Use Third-Party Launchers

    If you want more customization options, use third-party launchers to further personalize Facebook’s layout.

    Recommended Launchers:

    • Nova Launcher: Best for custom gestures and layouts.
    • Action Launcher: Ideal for a fast and smooth experience.

    Steps to Use a Launcher:

    • Download your preferred launcher from the Play Store.
    • Set up the launcher and select the “Default” option.
    • Customize the Facebook app as much as you like.

    5. Customize Browser Version Layout

    If you don’t use the app or prefer limited customization, you can also change the layout of the browser version.

    Steps to Customize Facebook on Browser:

    • Open Chrome or Firefox browser.
    • Log in to “m.facebook.com”.
    • Adjust display preferences in “Settings”.
    • Use the browser’s “Reader Mode” to create a more minimalistic layout.

    6. Join Facebook Beta Version

    Join Facebook’s Beta program to get early access to new features and layouts, offering a chance to explore experimental features.

    Steps to Join Beta Program:

    • Open the Play Store.
    • Search for the Facebook app.
    • If you see the “Join Beta Program” option, tap on it.
    • After the update, explore the new layouts and features.

    7. FAQs for Changing Facebook Layout

    Q1: Can I change the color scheme of my Facebook app?


    Yes, you can change the color scheme by enabling Dark Mode. For complete color customization, use third-party launchers.

    Q2: Is layout customization available on all Android devices?


    Yes, but some features may depend on device compatibility and app version.

    Q3: Are third-party launchers safe?


    Use trusted launchers verified on the Play Store, like Nova Launcher.

    Q4: Is there any risk in using the beta version?

    Beta versions are experimental and may have bugs, but they are generally safe.

    Conclusion

    Changing the Facebook layout is easy and customizable on Android. You can improve your Facebook experience by using built-in settings or third-party tools. Follow the steps above to make your Facebook layout more engaging.

  • How to Print Android Text Messages?

    How to Print Android Text Messages?

    Printing Android text messages is a simple process, but sometimes it can be confusing. If you need a physical copy of your important text messages, this detailed guide is perfect for you. Below is a step-by-step process to help you print your messages.

    1. First of All: Backup of Messages Is a Must

    You should take a backup of your text messages to ensure no important data is lost. The backup process is very simple and keeps your messages safe.

    Backup Options

    Use Google Drive:

    • Open your phone’s Messages app.
    • Go to Settings.
    • Select the Chat Backup option.
    • Enable Google Drive backup and connect to your Google account.

    Use Third-Party Apps:

    • If you don’t want to use Google Drive, you can use apps like SMS Backup & Restore.
    • Download and install the app.
    • Open the app and select the Create Backup option.
    • Save messages in XML or text file format.

    2. Exporting Messages

    After completing the backup, export your messages to make them printable.

    Steps for Export

    Using SMS Backup & Restore App:

    • Open the app and select your created backup file.
    • Click on the Export option and save the messages in PDF or text file format.

    Use of Screenshots:

    • If you don’t want to use backup apps, take screenshots of specific conversations and print them directly.

    3. Format Messages

    After exporting the messages, format them properly for readability before printing.

    Formatting Tips

    Edit in PDF Format:

    • Use a PDF editor to delete unnecessary parts.
    • Highlight important messages.

    Edit Text File:

    • If you exported your messages in text file format, open the file using Notepad or MS Word.
    • Divide long messages into separate lines and bold important sections.

    4. Setup Printer

    Now that your messages are ready to print, set up a printer and convert them into a physical copy.

    Steps for Printing

    Direct Printing from Phone:

    • Connect your phone to a Wi-Fi-enabled printer.
    • Open the exported file.
    • Select Print in the file options and customize settings (e.g., page size, layout).

    Printing via Computer:

    • Transfer the exported file to your computer (via USB or email).
    • Open the file and click on the Print option.
    • Connect the printer, adjust the print settings, and click Print.

    Important Tip:

    • If you don’t have a personal printer, visit a nearby cyber café or printing shop. Bring the file via a pen drive or email and get it printed.

    5. Organize Messages

    Organizing printed messages ensures they remain accessible and protected.

    Organizing Tips

    Use Folders:

    • Protect printed pages by storing them in a transparent folder.

    Maintain Digital Backup:

    • Along with the printed copy, save a digital copy of your exported file (on Google Drive or a pen drive).

    6. FAQs: About Printing Android Text Messages

    Q1: Can I print my messages without an app?


    Yes, you can print messages without any app by taking screenshots and printing them directly.

    Q2: Is it necessary to use any paid app?

    No, free apps like SMS Backup & Restore can handle the process easily.

    Q3: My printer is not Wi-Fi enabled. How do I print?


    Save the file on a pen drive and visit a nearby cyber café or printing shop to get it printed.

    Q4: Is this process secure?


    Yes, if you use trusted apps and save your files in secure locations, the process is absolutely secure.

    Conclusion

    Now you know how to print Android text messages. This process is simple if you follow the steps provided. By backing up, exporting, and formatting your messages properly, you can make them print-ready. If you face any issues, refer to the FAQs or seek help from an expert.

  • How to Turn Off Android Phone? A Comprehensive Guide [2025]

    How to Turn Off Android Phone? A Comprehensive Guide [2025]

    Android phones have become an important part of our lives. But sometimes there is a need to turn off the phone, like when the phone slows down, needs to restart, or when you want to reset your device. In this blog, we will discuss how you can turn off your Android phone in different ways. If you are a beginner or an experienced user, this guide will be useful for you.

    Basic ways to turn off Android phone

    1. Use of Power Button

    The most common and simple way is to use the power button.

    1. Find the Power Button: Every Android phone has a dedicated power button, which is usually on the side or top of the phone.
    2. Long Press: Press and hold the Power button for 2-3 seconds.
    3. Select Power Off Option: The option “Power Off” will appear on the screen. Confirm by tapping on it.

    This method works on almost all Android phones.

    Click here to read more: Why Is My Phone Moving on Its Own Android

    Methods of Restart and Force Shutdown

    1. Restart

    Sometimes it becomes necessary to turn off the phone and then start it again. Steps to restart:

    1. Press the Power button.
    2. The option of “Restart” will appear. Tap on it.

    Restart clears the temporary data of the phone and improves performance.

    2. Force Shutdown

    If the phone freezes or is not responding, then use force shutdown.

    1. Press and hold the Power button for 10-15 seconds.
    2. The phone will automatically turn off.

    Advanced method: Use settings

    If your power button is not working or you are looking for an alternative method, you can turn off your phone using settings.

    1. Open Settings app: Go to your phone’s settings.
    2. Select System option: Scroll down and find the option of “System” or “About Phone”.
    3. Shut down option: Here you will find the option of “Power Off”. Tap on it to confirm.

    Click here to read more: Why Is My Phone Moving on Its Own Android

    Use of Scheduled Power Off

    Do you want to automatically turn off your phone? Scheduled Power Off is a useful feature that is often available in Android devices.

    Steps:

    1. Open Settings: Go to the settings of your phone.
    2. Battery & Performance Section: Here you will find the option of “Scheduled Power On/Off”.
    3. Set Timing: Set the timing as per your convenience when you want to turn off the phone.

    This feature is helpful for those people who want to automatically turn off their phone at night.

    Click here to read more: How to turn off GPS on your Android phone

    Use of Android Recovery Mode

    If your phone is not shutting down in the normal way, then recovery mode is a good option.

    Steps:

    1. Turn off the phone: Turn off the phone by pressing the Power button.
    2. Enter Recovery Mode: Press the Power button and volume down button together to enter recovery mode.
    3. Power Off Option: Select the “Power Off” option in the Recovery menu.

    This method is useful when the phone has a software issue.

    Turn off the phone using voice commands

    Today’s Android phones come with Google Assistant which supports voice commands.

    Steps:

    1. Activate Google Assistant: Activate the assistant by saying “Hey Google” or “OK ​​Google”.
    2. Give the command: Say, “Turn off my phone.”
    3. Confirmation: If the phone is compatible, the assistant will turn off the power.

    This method is useful for modern devices.

    Use of Third-Party Apps

    If you are looking for an alternative way, then the phone can also be turned off using third-party apps.

    Recommended Apps:

    1. Power Menu App: You can turn off your phone through this app.
    2. Button Mapper: If the power button is not working, then you can map any other button as the power button with this app.

    Note: Before installing third-party apps, make sure to check their permissions and security.

    Phone turns off when battery drains

    If your phone is not turning off manually, then one option is to drain its battery.

    Steps:

    1. Run background apps: The more apps you use, the faster the battery will drain.
    2. Set brightness high: Set screen brightness to maximum.
    3. Exhaust battery: When the battery reaches 0%, the phone will automatically turn off.

    This method is for emergency situations and is not recommended for regular use.

    Common Issues and Their Solution

    1. Power Button is not working

    • Use apps like Button Mapper.
    • Use Scheduled Power Off feature.

    2. Phone is frozen

    • Use Force shutdown.
    • If the issue is not resolved, contact the service center.

    3. Software Glitch

    • Use Recovery mode.
    • Factory reset can be an option.

    Conclusion

    There are many ways to turn off an Android phone, whether it is using the basic power button, using the settings, or advanced methods like recovery mode. Each method has its own purpose and utility. I hope this blog will be helpful for you. If you need a solution to any specific problem, then definitely write in the comments below!

  • Snapchat Planets: What is this feature and how does it work? [2025]

    Snapchat Planets: What is this feature and how does it work? [2025]

    Snapchat has become an important part of our daily life, and new features keep coming on this platform. One such unique feature is “Snapchat Planets.” If you do not know about it or want to understand it in detail, then come to this blog where we will understand every small and big thing about this feature.

    What is Snapchat Planets?

    Snapchat Planets is a fun and interactive feature that visually represents the relationship between you and your friends. In this feature, the rank of you and your friends is shown in the form of planets in the solar system. This feature is mainly available to Snapchat+ (paid subscription) users.

    Snapchat+ is a premium subscription that gives Snapchat users access to exclusive features. It has a special feature called “Friends Solar System,” which we call “Snapchat Planets.” This feature shows your level of interaction with friends in a creative and engaging way.

    How does Snapchat Planets work?

    Snapchat Planets are based on the level of your friendship interaction. The friend who is closest to you in your Snap Solar System is your “Best Friend”, and their planet rank is Mercury. Similarly, the one who is a little farther from you is represented in the form of Venus, Earth, Mars, and the rest of the planets.

    Each planet has a unique meaning and rank:

    • Mercury: Your closest friend.
    • Venus: The second-closest friend.
    • Earth: The third rank in your friendship zone.
    • Mars: Fourth-ranked friends.
    • Jupiter: Fifth-ranked friends.
    • Saturn: Sixth-ranked friends.
    • Uranus: Seventh-ranked friends.
    • Neptune: Eighth-ranked friend.

    These rankings are based on real-time interactions and Snapchat’s AI algorithms. As you share more Snaps, chat, and maintain streaks with a friend, their rank may change.

    How to access Snapchat Planets?

    To see Snapchat Planets, you need to have a Snapchat+ subscription. If you have a subscription, you can see your friends’ planets by following these steps:

    1. Snapchat+ Subscription: This feature is exclusive to Snapchat+ users. If you are a Snapchat+ subscriber, you will see this on your friend’s profile.
    2. Open Friend’s Profile: Explore this feature by going to the profile of the friend with whom you have more interaction.
    3. Solar System Icon: You will find a small solar system icon that will show the rank between you and that friend.

    Snapchat+ Subscription Information

    Snapchat+ is a paid subscription service that gives you access to new and exclusive features. Some highlights of Snapchat+ are:

    • Unique Features: You get Snapchat Planets as well as other features like custom app icons, priority story replies, and exclusive badges.
    • Cost: Snapchat+ monthly subscription cost is around $3.99. You can also take a yearly plan which is a little economical.
    • Availability: This service is available only in selected countries. Its coverage is increasing.

    Taking Snapchat+ enhances your overall Snapchat experience and gives you premium user status.

    What is the significance of Snapchat Planets?

    Snapchat Planets feature has many benefits and interesting aspects:

    1. Relationship Understanding: This feature helps you understand which friend you have a stronger connection with.
    2. Interactive Design: The visual representation of planets like the solar system is a unique and fun way to see your friendship levels.
    3. Dynamic Nature: This feature keeps updating with time, so you can track your interactions with your friends.
    4. Exclusivity: Snapchat Planets feature is available only for premium users, which makes it even more special.

    Another benefit of this is that it motivates you to increase engagement with your friends. You are inspired to send more Snaps and have conversations.

    Snapchat Planets and a new way to explore friendships

    The Snapchat Planets feature is a creative and innovative way to explore your friendships better. It shows you how close you are to which friend and who is a little farther away. With this feature, you can make your friendship even stronger and more engaging.

    Some users’ real-life examples also highlight the importance of this feature. Like:

    • Riya and Priya: Riya saw that her best friend Priya is now on her “Venus”, and a new friend has arrived on Mercury. This increased her interaction with Priya and strengthened their bond.
    • Aman and Varun: Aman introduced his friend Varun through Snapchat Planets and they shared funny moments by discussing their rank.

    How can Snapchat Planets boost friendship?

    The Snapchat Planets feature can make friendship dynamics more interesting. Here are some things you can try:

    1. Set Friendship Goals: Improve your rank by interacting more with your friends.
    2. Fun Conversations: Start fun and engaging conversations by discussing your friends’ ranks.
    3. Create Competitions: See who can become your “Best Friend”.

    All these things will make your bonding with your friends stronger.

    FAQs (Frequently Asked Questions)

    1. Is Snapchat Planets available for free users? No, this feature is exclusive to Snapchat+ users only.
    2. Does the rank of Snapchat Planets change? Yes, the rank of planets can change depending on the interaction between you and your friends.
    3. How much does Snapchat+ cost? The cost of Snapchat+ varies depending on different regions. But the average cost is around $3.99/month.
    4. Is Snapchat Planets a permanent feature? This feature is linked with Snapchat+ subscription. You can use this feature as long as your subscription is active.
    5. If the interaction decreases, does the rank of the planet fall? Yes, if you reduce interaction with any of your friends, then their rank can shift towards lower planets.
    6. Does this feature impact privacy? No, Snapchat Planets only shows the interactions between you and your friends. This feature is private and cannot be seen by other users.

    Future Potential of Snapchat Planets

    Snapchat Planets is a feature that takes the interaction between friends to a new level. In the coming time, more new updates can come in this feature, such as:

    1. Customization Options: You will be able to customize the colors and designs of your planets.
    2. Group Planets: A separate solar system can be created for a group.
    3. Historical Data: It will be possible to compare the ranks of planets from previous months.
    4. Augmented Reality (AR): Viewing planets in AR and interacting with them can bring a new experience.

    All these things will make the Snapchat experience even more engaging and entertaining.

    Snapchat Planets is a futuristic and fun feature that blends technology and creativity. If you’re a Snapchat+ user, enjoy this feature and have more fun by discussing your ranks with your friends!

  • How Much Is Android Worth?

    How Much Is Android Worth?

    Android, the most popular mobile operating system, dominates the smartphone industry. But what is Android’s real value? From its development to its impact on the market, Android’s value is much more than just its monetary worth. Let’s understand how Android’s worth is calculated.

    Why is Android worth so much?

    • Global Reach: Android is the most widely used mobile OS, with billions of active users worldwide.
    • Google’s Investment: Android is part of Google’s ecosystem, which makes huge investments for software development, security features, and updates.
    • App Economy: There are millions of apps available on the Google Play Store, which increase Android’s worth.
    • Brand Value: Android powers devices like smartphones, tablets, wearables, and TVs, making Android a major player in the tech ecosystem.

    What things contribute to Android’s worth?

    Method 1: Market Share and User Base

    Android’s market share is quite large. There are more than 2.5 billion active Android devices worldwide, which significantly increases its value.

    Method 2: Revenue from Google Play Store

    The Google Play Store generates billions of dollars each year, which further increases Android’s worth. This revenue comes from app purchases, subscriptions, and in-app purchases.

    Method 3: Licenses and Partnerships

    Android is open-source, but device manufacturers must pay licensing fees to use Google’s apps and services, which increases Android’s financial worth.

    Method 4: Google’s Role

    Google generates a lot of revenue from advertising on Android devices, which contributes to Android’s overall worth. Google also earns money by selling apps and services from the Play Store.

    How does Android’s worth compare to other mobile operating systems?

    Android is the most widely used OS in the world, competing with Apple’s iOS. But Android’s open-source nature and wider device compatibility help it give it a greater global market share than iOS, which increases its worth.

    Pros and Cons of Android’s Worth

    Pros:

    • Huge Market Share: With billions of users, Android’s value is supported by a massive user base.
    • Open-Source: Android’s open-source model provides more flexibility and accessibility, which increases its worth.

    Cons:

    • Fragmentation: Different Android versions and devices cause some fragmentation, which can sometimes affect the user experience.
    • Security Issues: Being open-source, Android devices are sometimes exposed to security vulnerabilities, which impacts its overall value.

    Android is worth a lot, and it is a major player in the mobile industry. Due to its global reach, app ecosystem, and Google’s investment, the value of Android is continuously growing.

  • How to Print Out Text Messages from Android?

    How to Print Out Text Messages from Android?

    Sometimes you need to print out your important text messages, whether it is personal or professional. Printing text messages on an Android phone can be a bit tricky, but by following some simple steps you can easily print your SMS messages. Here we will tell you how you can print text messages from your Android phone.

    Why Would You Need to Print Out Text Messages?

    • Important Conversations: If there is an important conversation which you want to document.
    • Legal Reasons: Printing out text messages may be necessary in some legal matters.
    • Backup Purposes: You can print to take backup of your important messages.
    • Memory Preservation: You want to preserve some special messages of yourself or your loved ones.

    Methods to Print Out Text Messages from Android

    Method 1: Using Android’s Screenshot Feature

    1. Open the Conversation: Open your SMS conversation that you want to print.
    2. Take a Screenshot: Press Volume Down + Power button together to take a screenshot of your phone.
    3. Transfer to Computer: Transfer the screenshot from your phone to the computer.
    4. Print the Screenshot: Open the screenshot on the computer and print it.

    Method 2: Using SMS Backup and Restore Apps

    1. Download an App: Download an app like SMS Backup & Restore from the Google Play Store.
    2. Backup Messages: Use the app to backup your text messages.
    3. Export as XML or Text File: After backup, export the messages in XML or text file format.
    4. Transfer to Computer: Transfer the file to your computer.
    5. Print the File: You can print it by opening the file.

    Method 3: Using Email to Print Messages

    1. Select Messages: Select the messages you want to print on your Android phone.
    2. Copy and Paste: Copy the messages and paste them in your email.
    3. Send the Email: Send the email to yourself or someone else.
    4. Open on Computer: Open your email on the computer and print it.

    Method 4: Using Google Drive or Google Docs

    1. Copy Messages: Copy the messages from your Android phone.
    2. Open Google Docs: Open your Google Docs app or go to docs.google.com in the browser.
    3. Paste the Messages: Paste the messages in Google Docs.
    4. Save and Print: Save Google Docs and print from the computer.

    Tips for Printing Text Messages from Android

    • Ensure Proper Formatting: When you are transferring text, ensure that the formatting is proper so that the messages appear clear.
    • Use Trusted Apps: The apps you are using should be trusted so that your messages are secure.
    • Backup Messages Regularly: Backup your important messages on a regular basis so that no important message is lost.
    • Printer Compatibility: Ensure that your printer is properly connected and the file format is supported.

    Pros and Cons of Printing Text Messages from Android

    Pros:

    • Important Records: You keep a record of your important messages, which may be necessary for legal or personal use.
    • Easy Accessibility: You can easily print your text messages without any complicated process.

    Cons:

    • Formatting Issues: If you print SMS directly, formatting can get a little messy.
    • App Dependency: Some methods require apps, which are not available all the time.

    Printing text messages from Android has now become easy with the right tools. By following these methods, you can print your important messages, but always keep the privacy of your messages in mind!

  • How to Fix Radio Off on Android?

    How to Fix Radio Off on Android?

    Sometimes, you are listening to the radio on your Android phone, and suddenly you get a message of “Radio Off” or the radio turns off. This issue can be quite frustrating, but you can fix it by following some simple steps. Here we will tell you how to fix the “Radio Off” error on your Android phone.

    Why Does the Radio Turn Off on Android?

    • Network Issue: If your phone’s network is weak, then the radio may turn off.
    • App Glitch: Sometimes there may be a glitch or bug in the radio app that turns off the radio.
    • Software Issue: Your phone’s software issue can also be the reason for the radio to turn off.
    • Battery Saver Mode: If your phone is in battery saver mode, the radio app is not allowed to run in the background.

    Methods to Fix Radio Off on Android

    Method 1: Check Internet or Network Connection

    1. Check WiFi/Network: If you are listening to internet radio, check your WiFi or mobile data. If the connection is weak, the radio app will not work properly.
    2. Reconnect to Network: Turn off WiFi or mobile data, then turn it on again, and restart the radio app.

    Method 2: Restart Your Phone

    1. Restart Phone: Sometimes a simple restart solves the radio issue. Restart the phone and try again.
    2. Try Playing Radio Again: After the phone restarts, open the radio app and see if the radio is working properly.

    Method 3: Clear Cache and Data of the Radio App

    1. Go to Settings: Go to the “Settings” of the phone.
    2. Apps: Go to the “Apps” section and find your radio app.
    3. Clear Cache/Data: Go to the “Storage” option and click on “Clear Cache” and “Clear Data.”
    4. Restart App: Now open the app again and try to listen to the radio.

    Method 4: Update the Radio App

    1. Check for Updates: If your radio app is outdated, go to the Play Store and check if there is any update available.
    2. Update App: If an update is available, update the app and try again.

    Method 5: Turn Off Battery Saver Mode

    1. Go to Battery Settings: Open the “Battery” section in Settings.
    2. Disable Battery Saver: If battery saver mode is on, turn it off. This will allow the radio app to run in the background.
    3. Check Radio App: Now open your radio app and see if the issue is resolved.

    Tips to Prevent Radio from Turning Off

    • Keep Your Software Updated: Update your phone’s software regularly so that bugs are fixed.
    • Check for App Updates: Use the latest version of the radio app.
    • Stable Network: Always use a stable internet connection if you are listening to internet radio.

    Pros and Cons of Fixing Radio Off Issue on Android

    Pros:

    • Enjoy Radio without Interruptions: You can easily listen to your favorite radio station without interruptions.
    • Improved Listening Experience: If the issue is fixed, you can enjoy a better listening experience.

    Cons:

    • Temporary Network Issues: If there is a network problem, the radio app still will not work.
    • App Bugs: If the app bug is not resolved, the radio-off issue may occur again and again.

    Fixing the “Radio Off” issue on Android is pretty simple with the right steps. By following these methods, you can easily get your radio back on track and enjoy uninterrupted listening.

  • How to Speed Up a Video on Android?

    How to Speed Up a Video on Android?

    Sometimes it happens that you want to watch a video quickly, or you need to speed up the video so that you can finish more content quickly. Speeding up videos on an Android phone is quite simple, and you can do it through some easy steps. Here we will tell you how to speed up a video on your Android phone.

    Why Would You Need to Speed Up a Video?

    • Save Time: If you want to watch lengthy videos quickly.
    • Skip Unnecessary Parts: Sometimes there are some irrelevant parts in the video which you want to skip.
    • Faster Learning: You can learn quickly by watching educational videos at a fast speed.

    Methods to Speed Up a Video on Android

    Method 1: Using Built-In Video Player (Android 6 and Above)

    1. Open the Video: Open the video in your phone’s default video player.
    2. Look for Speed Option: Look for the option to increase the speed in the video player controls (it may appear with the label “1x” or “playback speed”).
    3. Increase Speed: Set the speed to “1.5x” or “2x”.
    4. Play the Video: Now your video will start playing at fast speed.

    Note: This method is mostly available on modern Android phones that run on Android 6 and above versions.

    Method 2: Using Third-Party Apps

    1. Download a Video Editing App: Download video editing apps like “InShot” or “Kinemaster” from the Play Store.
    2. Import the Video: Import the video into the app.
    3. Speed Adjustment: Select the “Speed” option in the video editing tools and set your desired speed.
    4. Export the Video: After speeding up the video, save or export it.

    Method 3: Using YouTube (For Videos on YouTube)

    1. Open the Video on YouTube: Open the video in the YouTube app.
    2. Tap on the Three Dots: Tap the three dots on the right side of the video.
    3. Select Playback Speed: Choose the “Playback Speed” option.
    4. Choose Speed: Select “1.5x” or “2x” speed.

    Click here to read more: How to Combine Videos on Android for Free

    Tips for Speeding Up Videos on Android

    • Use Trusted Apps: Always use trusted apps to avoid any malware or security issues.
    • Check for Compatibility: Make sure your phone’s video player or editing app supports video speed adjustments.
    • Storage Consideration: Speeding up videos through editing apps might take up more storage, so ensure you have enough space.

    Pros and Cons of Speeding Up Videos on Android

    Pros:

    • Time-Saving: Quickly finish long videos by speeding them up.
    • Improved Productivity: Educational content can be learned quickly by watching it at fast speed.

    Cons:

    • Loss of Clarity: It may be difficult to understand the content of the video by watching it at a very fast speed.
    • Quality Drop: Sometimes the quality of the video may degrade slightly when using editing apps.

    Speeding up a video is quite easy on Android, and it can be a time-saver. By following the above methods, you can watch your videos at a fast speed, but always keep in mind your video quality and clarity!