Category: Android Tips & Tricks

  • Best Weather Apps for Android in 2025: What You Need to Know

    Best Weather Apps for Android in 2025: What You Need to Know

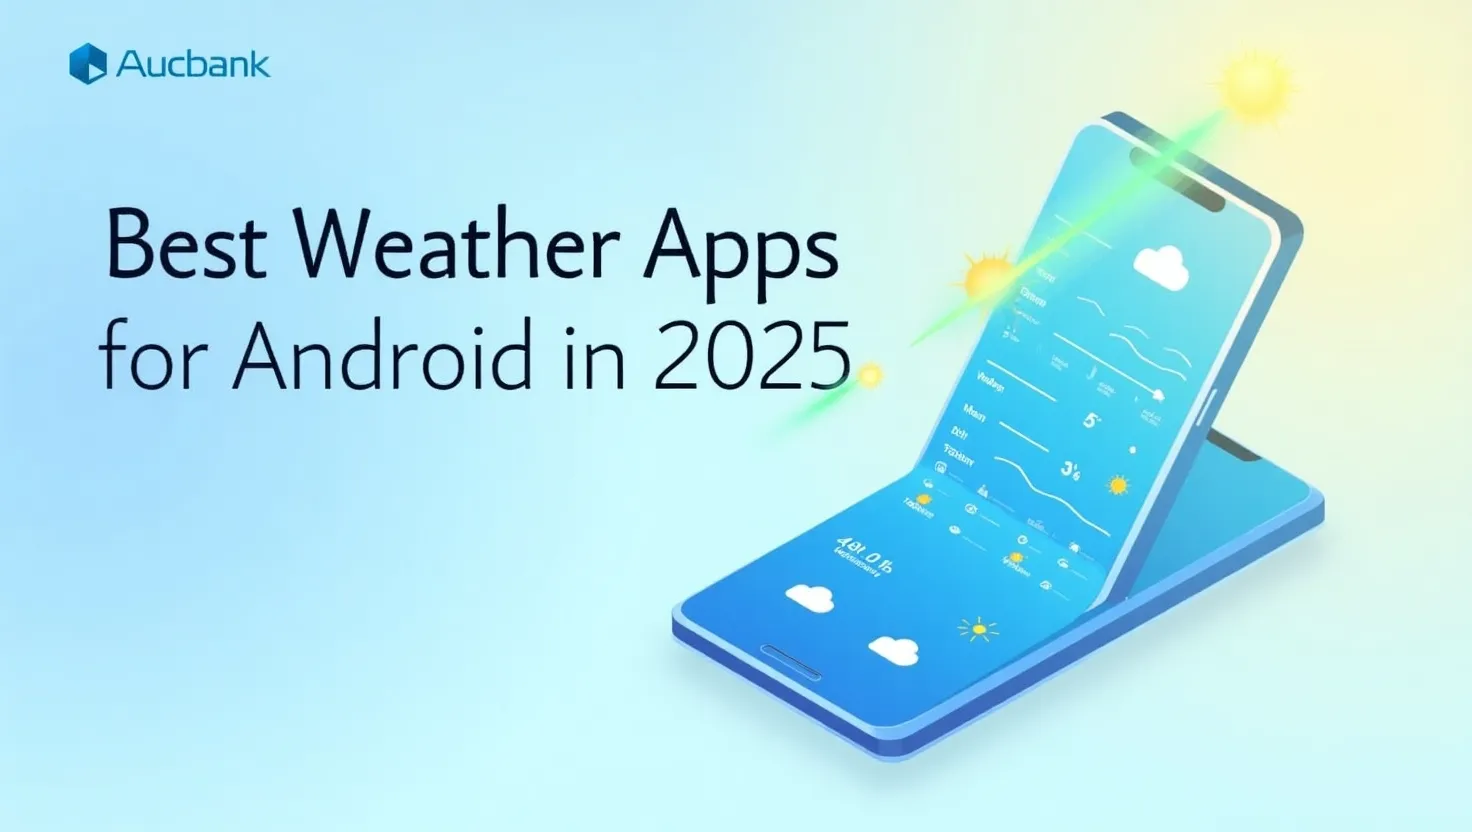
    1. Which are the best weather apps for Android phones?

    Best weather apps for Android phones ke liye kuch popular options hain:

    • AccuWeather: Accurate forecasts, real-time alerts, and a user-friendly interface.
    • The Weather Channel: Provides weather radar, forecasts, and storm alerts.
    • Windy: Great for detailed weather maps and wind forecasting, popular among outdoor enthusiasts.
    • Google Weather: A simple app offering quick and accurate forecasts without extra features.
    • Yahoo Weather: Known for its stunning background images matching the weather.

    Key features: Accurate forecasts, radar, weather maps, and widgets.

    2. Which is the most accurate weather app for Android?

    AccuWeather is widely regarded as one of the most accurate weather apps. It provides hyper-localized forecasts and radar, and its MinuteCast feature provides minute-by-minute precipitation forecasts.

    Other accurate options:

    • The Weather Channel: Known for its detailed reports and storm tracking.
    • Weather Underground: Offers data from personal weather stations, which makes it accurate at a local level.
    • Google Weather: Google’s simple interface is surprisingly accurate for general forecasting.

    3. Which free weather apps for Android show radar?

    Free weather apps with radar include:

    • The Weather Channel: Provides live radar maps and weather alerts.
    • AccuWeather: Free version offers radar and satellite maps.
    • Weather Underground: Offers interactive radar and map features for free.
    • Windy: Free with detailed weather maps, including wind, waves, and precipitation.
    • RadarScope: Offers advanced radar features, though the free version is limited.

    4. How to choose the best weather app for your Android?

    Things to keep in mind when choosing the best weather app:

    • Accuracy: Check if it provides precise forecasts for your local area.
    • Features: Do you need radar, maps, alerts, or minute-by-minute forecasts?
    • User Interface: The app should have a simple and easy-to-use design.
    • Offline Availability: Choose an app that provides weather updates without the internet if you face network issues.
    • Battery Usage: Select apps that consume less battery.

    5. Is AccuWeather the best weather app for Android?

    AccuWeather is one of the best weather apps for Android, especially known for its accuracy in forecasts. It offers:

    • MinuteCast for minute-by-minute forecasts.
    • Radar maps and satellite images.
    • Real-time weather alerts and severe weather warnings.
    • A simple interface with detailed weather data like temperature, humidity, and wind speed.

    Pros:

    • Reliable accuracy.
    • Detailed long-term forecasts.
    • Available globally.
    • Cons:
    • Ads in the free version.

    6. Which weather apps work offline on Android?

    Some weather apps that work offline:

    • AccuWeather: Forecasts can be downloaded for offline use.
    • The Weather Channel: Allows you to view cached data when you are offline.
    • Yahoo Weather: Caches weather information when connected to the internet for offline use.
    • Weather Underground: Offline radar viewing is available with a paid subscription.
    • MyRadar: Stores weather data offline for radar viewing.

    7. Which Android weather app shows a minute-by-minute forecast?

    AccuWeather’s MinuteCast feature provides minute-by-minute forecasts, updating every 2-3 minutes. It’s especially useful for rain predictions.

    Other options:

    • The Weather Channel: Provides minute-by-minute weather updates in some areas.
    • Dark Sky: A very accurate minute-by-minute weather prediction service (recently acquired by Apple, but still usable on Android via third-party apps).

    8. How can I get weather alerts on my Android phone?

    Yes, you can get weather alerts on your Android phone:

    • AccuWeather: Offers severe weather alerts, including rain, thunderstorms, and tornado warnings.
    • The Weather Channel: Provides customizable weather alerts for storms, hurricanes, and other severe conditions.
    • Google Weather: Offers basic weather notifications for changes in conditions.
    • Weather Underground: Allows you to set weather alerts based on your preferences (severe weather, rainfall, etc.).

    9. Top weather apps for Android that come with widgets?

    Some top weather apps that offer widgets:

    • The Weather Channel: Offers customizable widgets with detailed weather data.
    • AccuWeather: Has various widget sizes showing current weather conditions.
    • Yahoo Weather: Offers beautiful widgets with backgrounds that match the weather conditions.
    • Google Weather: Provides a basic widget for current weather conditions.
    • 1Weather: Offers multiple widget options with forecasts, radar, and alerts.

    10. How to get live weather updates on your Android phone?

    For live weather updates you need reliable apps:

    • AccuWeather: Provides live updates with real-time weather data.
    • The Weather Channel: Offers live radar and storm tracking.
    • Weather Underground: Gives real-time updates with data from local stations.
    • Google Weather: Offers live weather updates with real-time changes.

    11. Weather apps for Android that show maps and radar, which ones are there?

    Weather apps with maps and radar:

    • Windy: Provides detailed maps and weather data for wind, waves, and precipitation.
    • The Weather Channel: Offers live radar maps with severe weather tracking.
    • AccuWeather: Displays radar and satellite imagery.
    • RadarScope: Advanced radar maps for weather enthusiasts.
    • MyRadar: Interactive radar maps, including severe weather alerts.

    12. Which weather app is the best for Android in 2025?

    By 2025, apps like AccuWeather, The Weather Channel, and Windy are likely to remain popular due to their continued accuracy and comprehensive features. Dark Sky might also make a comeback, depending on its transition post-Apple acquisition.

    13. How accurate is Google Weather app on Android?

    Google Weather generally offers accurate forecasts, especially for general conditions. It pulls data from The Weather Channel and Weather.com, which makes it reliable for everyday use, though it lacks some advanced features like radar or minute-by-minute forecasts.

    14. Does Android Weather app support hourly forecasts?

    Yes, Android Weather apps like Google Weather, AccuWeather, and The Weather Channel support hourly forecasts. You can easily see the forecast for the next 24-48 hours in these apps.

    15. Is there any weather app for Android that comes without ads?

    Ad-free weather apps:

    • AccuWeather (Premium version): No ads in the paid version.
    • The Weather Channel (Premium version): Removes ads with a subscription.
    • Weather Underground (Premium version): Offers an ad-free experience with a paid plan.
    • Yahoo Weather: Ad-free on the mobile website version, though the app has ads.

    You can choose the best app according to your needs which is most accurate and helpful for you.

  • How to Set Up Voicemail on AT&T Android? (Step-by-Step Guide)

    How to Set Up Voicemail on AT&T Android? (Step-by-Step Guide)

    If you are using the AT&T network and want to set up voicemail on your Android phone, this guide is for you. Voicemail is a useful feature that stores recorded messages for your missed calls so you can listen to them later. Let’s see step-by-step how you can set up voicemail on an AT&T Android phone.

    Step 1: Open the Phone App

    • Open the Phone app on your Android phone.
    • Go to the dial pad and press and hold 1.
    • If your voicemail is not already set up, a message will appear that will start the setup.

    Step 2: Set Voicemail Password

    • AT&T will ask you to set a 7-15 digit voicemail password.
    • Choose a strong, memorable password.
    • Once the password is set, confirm and proceed.

    Step 3: Record a Greeting

    You’ll have the option to record a personal greeting.

    • Default Greeting: You can use a system-generated message.
    • Custom Greeting: Record your own message (such as “Hi, this is [Your Name], please leave a message”).
    • Confirm after listening to your recording.

    Step 4: Save Voicemail Settings

    • Once you’ve set your password and greeting, follow the instructions and save the changes.
    • Your voicemail is now successfully set up.

    Step 5: How to Check Voicemail?

    • To check voicemail, press and hold 1 or open the Visual Voicemail app (if supported).
    • You will find all the unheard messages.

    Alternative Method: Use AT&T Visual Voicemail App

    If you want a better experience than traditional voicemail, you can use AT&T’s Visual Voicemail app:

    1. Download the AT&T Visual Voicemail app from Google Play Store.
    2. Open the app and log in with your AT&T number.
    3. Follow the instructions and complete the setup.

    FAQs (Frequently Asked Questions)

    1. Will I be charged extra for setting up AT&T voicemail?

    No, setting up voicemail is free. But standard calling charges may apply for listening to voicemails.

    2. Can I access voicemail without a password?

    No, AT&T will ask you to set a password for security reasons.

    3. What if you forget your voicemail password?

    You can reset your password by logging into your AT&T account or by contacting customer support.

    4. Do I need internet to set up voicemail?

    Traditional voicemail does not require internet, but Visual Voicemail app does require an internet connection.

    Conclusion

    Setting up voicemail on an AT&T Android phone is a simple process. You can use either traditional voicemail or the Visual Voicemail app. If you found this guide helpful, share it with your friends!

  • How to Forward a Text to Email on Android? (Step-by-Step Guide)

    How to Forward a Text to Email on Android? (Step-by-Step Guide)

    Android devices have the option to forward messages, but many people don’t know how to forward SMS or text messages to email. This feature can be very useful when you want to back up an important message or share it with an email address. In this guide, we will see step-by-step how to send a text message to email on Android.

    Method 1: Manually Forward Text to Email

    If you want to send one or two messages to email, you can manually forward them:

    Step 1: Open the Messages App

    Open the Messages app on your Android phone.

    Step 2: Select Message

    Long-press on the SMS or text message you want to send to your email.

    Step 3: Select Forward Option

    After the Forward option appears, tap on it.

    Step 4: Enter Email Address

    In the recipient field, enter your email address.

    Example: yourname@example.com

    Step 5: Click on Send Button

    As soon as you press the send button, your SMS will be sent to your email.

    Method 2: Using Third-Party Apps

    If you need to forward SMS to email on a regular basis, you can use a third-party app. Some popular apps that can help you:

    • SMS to Email Forwarder – Auto-forward messages to your email.
    • AutoForward SMS – With customizable forwarding rules.
    • IFTTT (If This Then That) – Best for creating automated workflows.

    Steps to Use Third-Party Apps:

    1. Install an app from the Play Store.
    2. Open the app and set up email forwarding.
    3. Allow required permissions.
    4. Set and enable auto-forwarding rules.

    Method 3: Use Google Voice (If Available)

    If you use Google Voice, you can easily forward your texts to email.

    Steps to Enable SMS Forwarding in Google Voice:

    1. Open Google Voice App
    2. Go to Settings
    3. Go to Messages Section
    4. Enable Forward Messages to Email Option
    5. Save Settings

    Now all the texts that come to your Google Voice number will be automatically forwarded to your email.

    FAQs (Frequently Asked Questions)

    1. Is this feature available in every Android phone?

    Yes, the option to manually forward is available in every Android phone. For auto-forwarding, you will have to use a third-party app.

    2. Is there any built-in feature to convert SMS to email?

    No, stock Android or any major brand does not have such a built-in feature. So, either do it manually or use a third-party app.

    3. Can attachments of messages also be forwarded to email?

    No, normally only text is forwarded. If you want to forward MMS (Multimedia Message), then manually copy-paste or save the MMS and attach it to the email.

    Conclusion

    Forwarding text messages to email on Android is a very simple process. If you want to forward occasionally, then the manual method is best. If you need regular forwarding, then you will have to use third-party apps. If you found this guide helpful, then share it with your friends!

  • How to turn off Amber Alert on your Android phone?

    How to turn off Amber Alert on your Android phone?

    Amber Alert is an emergency alert that gives information about cases of missing children or any emergency situation. This alert comes on your phone whenever there is any such situation, but many people want to turn it off, because sometimes it can disturb. If you want to turn off Amber Alerts on your Android phone, then in this blog we will tell you simple steps.

    Why is there a need to turn off Amber Alert?

    • Avoiding disturbance: Sometimes Amber Alerts create unwanted disturbance.
    • Sleep Mode: If you are sleeping at night and an alert comes, it can wake you up.
    • Privacy: Some people like to control their personal settings, which also includes turning off alert notifications.

    Step 1: Go to Settings and turn off Amber Alerts

    1. Open Settings: Open your phone’s settings.
    1. Select Notifications: Find the “Notifications” option in Settings.
    1. Emergency Alerts: Here you will find the option of “Emergency Alerts” or “Wireless Emergency Alerts”, select them.
    1. Disable Amber Alerts: In this section you will find the toggle for “Amber Alerts”. Turn this toggle off.

    Step 2: Turn off Amber Alerts from Google Settings

    If you are getting Amber Alerts on your phone through Google, you can also disable it from Google Settings:

    1. Open Google Settings: Open the Google app on your phone.
    1. Manage Google Account: Go to Google account settings.
    1. Personalization Settings: Select the “Personalization” section.
    1. Disable Emergency Alerts: Find the “Emergency Alerts” option and disable it.

    Step 3: Make changes in Notification Settings

    If you only want to turn off notifications for Amber Alerts, you can make changes in the notification settings:

    1. Go to Settings: Open your phone’s Settings.
    1. Apps & Notifications: Select the “Apps & Notifications” option.
    1. Advanced Options: Tap “Advanced”, then select the “Emergency Alerts” option.
    1. Turn off Amber Alerts: From here you can turn off notifications for Amber Alerts.

    Click here to read more: How to turn off GPS on your Android phone

    Step 4: Check System Updates

    Sometimes Amber Alerts can come through system updates, so it is important to check for system updates:

    1. Go to Settings: Open your phone’s settings.
    1. System Updates: Find the “System Updates” option.
    1. Check for Updates: If an update is available, install it. After the updates, check the Amber Alerts settings again.

    Step 5: Check Carrier-Specific Settings

    If you are getting a lot of Amber Alerts on your phone, there may be an issue with your carrier’s settings. Managing carrier-specific settings may also be an option:

    1. Carrier Settings: Check the settings of your carrier (Jio, Airtel, Vodafone, etc.).
    1. Contact Customer Care: If you are not getting the option to turn off alerts, then contact the customer care of your carrier.

    Pro Tips for Managing Alerts on Your Phone

    • If Amber alerts are turning off, do not disable other emergency alerts, as they can give important information.
    • Regularly update your phone’s notification settings.
    • If alerts are creating a lot of disturbance, then you can use “Do Not Disturb” mode.

    Final Words

    Turning off Amber Alerts is simple, and you can easily disable it from your Android phone’s settings. If you feel that these alerts are disturbing you, then follow the steps given above. If you still have a problem, then contact your carrier or service provider.

    If you found this blog helpful, then do share your feedback in the comments below!

  • How to Fix Messaging App on Your Android Phone?

    How to Fix Messaging App on Your Android Phone?

    The messaging app not working properly is a common problem that everyone has to face sometimes. If your messages are not being sent or the app is crashing, then there is no need to take tension. In this blog, we will discuss some simple solutions that will help you solve your messaging app issues.

    Common Issues in Messaging App

    • Messages are not being sent or received.
    • The app is crashing repeatedly.
    • Messages are taking time to load.
    • Notifications are not coming.

    Now let’s fix these problems step-by-step!

    Fix 1: Restart the Phone

    The simplest and most effective solution is to restart your phone once:

    1. Press the power button: Press the power button to turn off the phone.
    2. Restart: After waiting for a while, turn the phone on again.

    This method fixes small glitches.

    Fix 2: Check the Internet Connection

    Often messaging app issues occur due to poor internet connection. Ensure that:

    1. Your phone’s Wi-Fi or mobile data is properly connected.
    2. Internet speed should not be slow; use a speed test app to check the speed.
    3. Airplane mode should be off.

    Fix 3: Clear the Cache of the Messaging App

    Sometimes the problem occurs due to the app cache getting corrupted. Clearing the cache is an effective solution:

    1. Open Settings: Go to your phone’s settings.
    2. Select Apps/Applications: Open the list of installed apps.
    3. Choose the Messaging App: Tap on the Messaging app.
    4. Clear Cache: Go to the “Storage” section and select the “Clear Cache” option.

    Fix 4: Update the App

    If you are using the old version, then the app may have bugs. It is important to download the latest version:

    1. Open Google Play Store.
    2. Search for the Messaging app.
    3. Tap on the “Update” button (if available).

    Click here to read more: Where Are Text Messages Stored on Android?

    Fix 5: Reset the Default Messaging App

    If you have installed a third-party messaging app, resetting the default app can be helpful:

    1. Go to Settings: Open the phone settings.
    2. Select the Apps/Default Apps option.
    3. Set the Messaging App: Reset or change the default SMS app.

    Fix 6: Check System Update

    Outdated software can also be the reason for messaging issues. Update your phone’s software:

    1. Open Settings.
    2. Find the System Update option.
    3. Install the latest update.

    Fix 7: Reinstall the Messaging App

    If none of the methods work, uninstalling the app and then reinstalling it is an effective option:

    1. Uninstall the messaging app.
    2. Download the app again from Google Play Store.

    Fix 8: Check SIM Card Issues

    Sometimes the problem can also be due to the SIM card:

    1. Remove the SIM card and re-insert it.
    2. Ensure that your network provider is active.
    3. Talk to customer care if you are having network issues.

    Click here to read more: How to Print Out Text Messages from Android

    Pro Tips for Smooth Messaging App Performance

    • Delete unnecessary messages and media files.
    • Regularly clean the phone’s cache and junk files.
    • Keep a strong password and secure settings.

    Final Words

    If your messaging app is not working properly, then fix the problem by following the steps given above. If the problem is still not solved, then contact your phone’s service center.

  • How to Combine Videos on Android for Free

    How to Combine Videos on Android for Free

    If you want to combine videos on your Android phone, this guide is perfect for you! You can easily merge videos with free tools and apps. In this step-by-step guide, we will show you how to combine your videos for free without spending any money.

    1. Download a Video Editing App First, download a video editing app on your phone. Several free and excellent apps for Android offer video combining features.

    Best Free Video Editing Apps:

    • InShot – Easy to use with great editing options.
    • Kinemaster – Feature-rich and easy to combine clips.
    • VideoShow – Simple interface with merging capabilities.

    Steps to Download and Install:

    • Open the Google Play Store.
    • Type “InShot,” “Kinemaster,” or “VideoShow” in the search box.
    • Download and install the app.
    1. Select Videos Now, choose the videos you want to combine.

    Steps to Select Videos:

    • Open the app (InShot, Kinemaster, or VideoShow).
    • Select the “New Project” or “Create” option.
    • Pick the videos you want to combine from your phone’s gallery.
    1. Merge Videos Next, merge the selected videos, which is simple.

    Steps to Merge Videos:

    • Drag and drop the video onto the timeline.
    • To merge the videos seamlessly, you can use video transitions (optional).
    • Press the Play button to watch your combined video.
    1. Editing and Enhancements (Optional) You can enhance the combined video by adding music, text, or filters.

    Editing Features:

    • Text – Add text to the video.
    • Music – Add your favorite music.
    • Filters – Apply filters to enhance the video.
    1. Save and Share Once you’ve merged the videos and completed any edits, save your final video.

    Steps to Save and Share:

    • Click the Save button.
    • Save the video in your gallery.

    If you want, you can also share the video directly on WhatsApp, Instagram, or YouTube.

    1. FAQs:

    Q1: Can I combine videos for free? 

    Yes, apps like InShot, Kinemaster, and VideoShow allow you to combine videos for free.

    Q2: Is it difficult to use these apps? 

    No! These apps are user-friendly and provide step-by-step instructions.

    Q3: Can the combined video be saved in high quality? 

    Yes, you can save your combined video in high-quality settings.

    Q4: Are these apps free or paid? 

    The basic versions of these apps are free, but some premium features are available in the paid version.

    Conclusion: You can easily combine videos on your Android phone by following the steps above using these apps. These free apps make it simple to merge videos. Try them today and start combining your videos!

  • How to Turn Off Android Phone? A Comprehensive Guide [2025]

    How to Turn Off Android Phone? A Comprehensive Guide [2025]

    Android phones have become an important part of our lives. But sometimes there is a need to turn off the phone, like when the phone slows down, needs to restart, or when you want to reset your device. In this blog, we will discuss how you can turn off your Android phone in different ways. If you are a beginner or an experienced user, this guide will be useful for you.

    Basic ways to turn off Android phone

    1. Use of Power Button

    The most common and simple way is to use the power button.

    1. Find the Power Button: Every Android phone has a dedicated power button, which is usually on the side or top of the phone.
    2. Long Press: Press and hold the Power button for 2-3 seconds.
    3. Select Power Off Option: The option “Power Off” will appear on the screen. Confirm by tapping on it.

    This method works on almost all Android phones.

    Click here to read more: Why Is My Phone Moving on Its Own Android

    Methods of Restart and Force Shutdown

    1. Restart

    Sometimes it becomes necessary to turn off the phone and then start it again. Steps to restart:

    1. Press the Power button.
    2. The option of “Restart” will appear. Tap on it.

    Restart clears the temporary data of the phone and improves performance.

    2. Force Shutdown

    If the phone freezes or is not responding, then use force shutdown.

    1. Press and hold the Power button for 10-15 seconds.
    2. The phone will automatically turn off.

    Advanced method: Use settings

    If your power button is not working or you are looking for an alternative method, you can turn off your phone using settings.

    1. Open Settings app: Go to your phone’s settings.
    2. Select System option: Scroll down and find the option of “System” or “About Phone”.
    3. Shut down option: Here you will find the option of “Power Off”. Tap on it to confirm.

    Click here to read more: Why Is My Phone Moving on Its Own Android

    Use of Scheduled Power Off

    Do you want to automatically turn off your phone? Scheduled Power Off is a useful feature that is often available in Android devices.

    Steps:

    1. Open Settings: Go to the settings of your phone.
    2. Battery & Performance Section: Here you will find the option of “Scheduled Power On/Off”.
    3. Set Timing: Set the timing as per your convenience when you want to turn off the phone.

    This feature is helpful for those people who want to automatically turn off their phone at night.

    Click here to read more: How to turn off GPS on your Android phone

    Use of Android Recovery Mode

    If your phone is not shutting down in the normal way, then recovery mode is a good option.

    Steps:

    1. Turn off the phone: Turn off the phone by pressing the Power button.
    2. Enter Recovery Mode: Press the Power button and volume down button together to enter recovery mode.
    3. Power Off Option: Select the “Power Off” option in the Recovery menu.

    This method is useful when the phone has a software issue.

    Turn off the phone using voice commands

    Today’s Android phones come with Google Assistant which supports voice commands.

    Steps:

    1. Activate Google Assistant: Activate the assistant by saying “Hey Google” or “OK ​​Google”.
    2. Give the command: Say, “Turn off my phone.”
    3. Confirmation: If the phone is compatible, the assistant will turn off the power.

    This method is useful for modern devices.

    Use of Third-Party Apps

    If you are looking for an alternative way, then the phone can also be turned off using third-party apps.

    Recommended Apps:

    1. Power Menu App: You can turn off your phone through this app.
    2. Button Mapper: If the power button is not working, then you can map any other button as the power button with this app.

    Note: Before installing third-party apps, make sure to check their permissions and security.

    Phone turns off when battery drains

    If your phone is not turning off manually, then one option is to drain its battery.

    Steps:

    1. Run background apps: The more apps you use, the faster the battery will drain.
    2. Set brightness high: Set screen brightness to maximum.
    3. Exhaust battery: When the battery reaches 0%, the phone will automatically turn off.

    This method is for emergency situations and is not recommended for regular use.

    Common Issues and Their Solution

    1. Power Button is not working

    • Use apps like Button Mapper.
    • Use Scheduled Power Off feature.

    2. Phone is frozen

    • Use Force shutdown.
    • If the issue is not resolved, contact the service center.

    3. Software Glitch

    • Use Recovery mode.
    • Factory reset can be an option.

    Conclusion

    There are many ways to turn off an Android phone, whether it is using the basic power button, using the settings, or advanced methods like recovery mode. Each method has its own purpose and utility. I hope this blog will be helpful for you. If you need a solution to any specific problem, then definitely write in the comments below!

  • How Much Is Android Worth?

    How Much Is Android Worth?

    Android, the most popular mobile operating system, dominates the smartphone industry. But what is Android’s real value? From its development to its impact on the market, Android’s value is much more than just its monetary worth. Let’s understand how Android’s worth is calculated.

    Why is Android worth so much?

    • Global Reach: Android is the most widely used mobile OS, with billions of active users worldwide.
    • Google’s Investment: Android is part of Google’s ecosystem, which makes huge investments for software development, security features, and updates.
    • App Economy: There are millions of apps available on the Google Play Store, which increase Android’s worth.
    • Brand Value: Android powers devices like smartphones, tablets, wearables, and TVs, making Android a major player in the tech ecosystem.

    What things contribute to Android’s worth?

    Method 1: Market Share and User Base

    Android’s market share is quite large. There are more than 2.5 billion active Android devices worldwide, which significantly increases its value.

    Method 2: Revenue from Google Play Store

    The Google Play Store generates billions of dollars each year, which further increases Android’s worth. This revenue comes from app purchases, subscriptions, and in-app purchases.

    Method 3: Licenses and Partnerships

    Android is open-source, but device manufacturers must pay licensing fees to use Google’s apps and services, which increases Android’s financial worth.

    Method 4: Google’s Role

    Google generates a lot of revenue from advertising on Android devices, which contributes to Android’s overall worth. Google also earns money by selling apps and services from the Play Store.

    How does Android’s worth compare to other mobile operating systems?

    Android is the most widely used OS in the world, competing with Apple’s iOS. But Android’s open-source nature and wider device compatibility help it give it a greater global market share than iOS, which increases its worth.

    Pros and Cons of Android’s Worth

    Pros:

    • Huge Market Share: With billions of users, Android’s value is supported by a massive user base.
    • Open-Source: Android’s open-source model provides more flexibility and accessibility, which increases its worth.

    Cons:

    • Fragmentation: Different Android versions and devices cause some fragmentation, which can sometimes affect the user experience.
    • Security Issues: Being open-source, Android devices are sometimes exposed to security vulnerabilities, which impacts its overall value.

    Android is worth a lot, and it is a major player in the mobile industry. Due to its global reach, app ecosystem, and Google’s investment, the value of Android is continuously growing.

  • How to Speed Up a Video on Android?

    How to Speed Up a Video on Android?

    Sometimes it happens that you want to watch a video quickly, or you need to speed up the video so that you can finish more content quickly. Speeding up videos on an Android phone is quite simple, and you can do it through some easy steps. Here we will tell you how to speed up a video on your Android phone.

    Why Would You Need to Speed Up a Video?

    • Save Time: If you want to watch lengthy videos quickly.
    • Skip Unnecessary Parts: Sometimes there are some irrelevant parts in the video which you want to skip.
    • Faster Learning: You can learn quickly by watching educational videos at a fast speed.

    Methods to Speed Up a Video on Android

    Method 1: Using Built-In Video Player (Android 6 and Above)

    1. Open the Video: Open the video in your phone’s default video player.
    2. Look for Speed Option: Look for the option to increase the speed in the video player controls (it may appear with the label “1x” or “playback speed”).
    3. Increase Speed: Set the speed to “1.5x” or “2x”.
    4. Play the Video: Now your video will start playing at fast speed.

    Note: This method is mostly available on modern Android phones that run on Android 6 and above versions.

    Method 2: Using Third-Party Apps

    1. Download a Video Editing App: Download video editing apps like “InShot” or “Kinemaster” from the Play Store.
    2. Import the Video: Import the video into the app.
    3. Speed Adjustment: Select the “Speed” option in the video editing tools and set your desired speed.
    4. Export the Video: After speeding up the video, save or export it.

    Method 3: Using YouTube (For Videos on YouTube)

    1. Open the Video on YouTube: Open the video in the YouTube app.
    2. Tap on the Three Dots: Tap the three dots on the right side of the video.
    3. Select Playback Speed: Choose the “Playback Speed” option.
    4. Choose Speed: Select “1.5x” or “2x” speed.

    Click here to read more: How to Combine Videos on Android for Free

    Tips for Speeding Up Videos on Android

    • Use Trusted Apps: Always use trusted apps to avoid any malware or security issues.
    • Check for Compatibility: Make sure your phone’s video player or editing app supports video speed adjustments.
    • Storage Consideration: Speeding up videos through editing apps might take up more storage, so ensure you have enough space.

    Pros and Cons of Speeding Up Videos on Android

    Pros:

    • Time-Saving: Quickly finish long videos by speeding them up.
    • Improved Productivity: Educational content can be learned quickly by watching it at fast speed.

    Cons:

    • Loss of Clarity: It may be difficult to understand the content of the video by watching it at a very fast speed.
    • Quality Drop: Sometimes the quality of the video may degrade slightly when using editing apps.

    Speeding up a video is quite easy on Android, and it can be a time-saver. By following the above methods, you can watch your videos at a fast speed, but always keep in mind your video quality and clarity!

  • How to Screenshot a Snapchat on Android

    How to Screenshot a Snapchat on Android

    Snapchat is a fun app for sharing moments that disappear quickly, but sometimes you might want to save a snap or chat for later. Whether it’s for memories, important details, or professional reasons, you can safely take a screenshot while being mindful of Snapchat’s privacy rules.

    Why Take a Screenshot on Snapchat?

    • Save Important Info: Need to keep an address, event details, or a hilarious snap? Screenshots can help.
    • Capture Special Moments: Some snaps deserve to be cherished forever.
    • Document for Work: Sometimes, business conversations on Snapchat need to be saved.

    Easy Ways to Screenshot a Snapchat on Android

    1. Use Your Phone’s Screenshot Feature

    • Step 1: Open the snap or chat you want to save.
    • Step 2: Press the “Power” and “Volume Down” buttons at the same time.
    • Step 3: Keep in mind, Snapchat will notify the sender if you use this method.

    2. Take a Photo with Another Device

    • Step 1: Open Snapchat and display the snap on your screen.
    • Step 2: Grab another phone or camera and snap a picture of the screen.
    • Step 3: This method keeps it private—Snapchat won’t send a notification.

    3. Record Your Screen

    • Step 1: Use your phone’s built-in screen recorder or download a third-party app.
    • Step 2: Record the snap or chat as it plays.
    • Step 3: After recording, pause the video at the right moment and take a screenshot.

    Heads up: In some cases, Snapchat can detect screen recording and notify the sender.

    Things to Remember

    • Respect Privacy: Always ask the sender’s permission before taking a screenshot—it’s the right thing to do.
    • Use Screenshots Responsibly: Avoid misusing screenshots to protect your reputation and relationships.
    • Understand Notifications: Snapchat’s built-in methods notify the sender when you capture their content.

    Pros and Cons of Screenshots on Snapchat

    Pros

    • Save Key Details: Screenshots help you keep important snaps for later.
    • Quick Access: Once saved, you can view them anytime you want.

    Cons

    • Privacy Concerns: The sender might feel uncomfortable if they get notified.
    • Risk of Misuse: Using screenshots inappropriately can harm trust.

    Taking a screenshot on Snapchat doesn’t have to be tricky. By choosing the right method and being respectful of privacy, you can save the snaps you need without any hassle. Always remember—clear communication and consent go a long way in building trust.