Author: Aman Iqbal Shaikh

  • What Does Private Number Mean on Android?

    What Does Private Number Mean on Android?

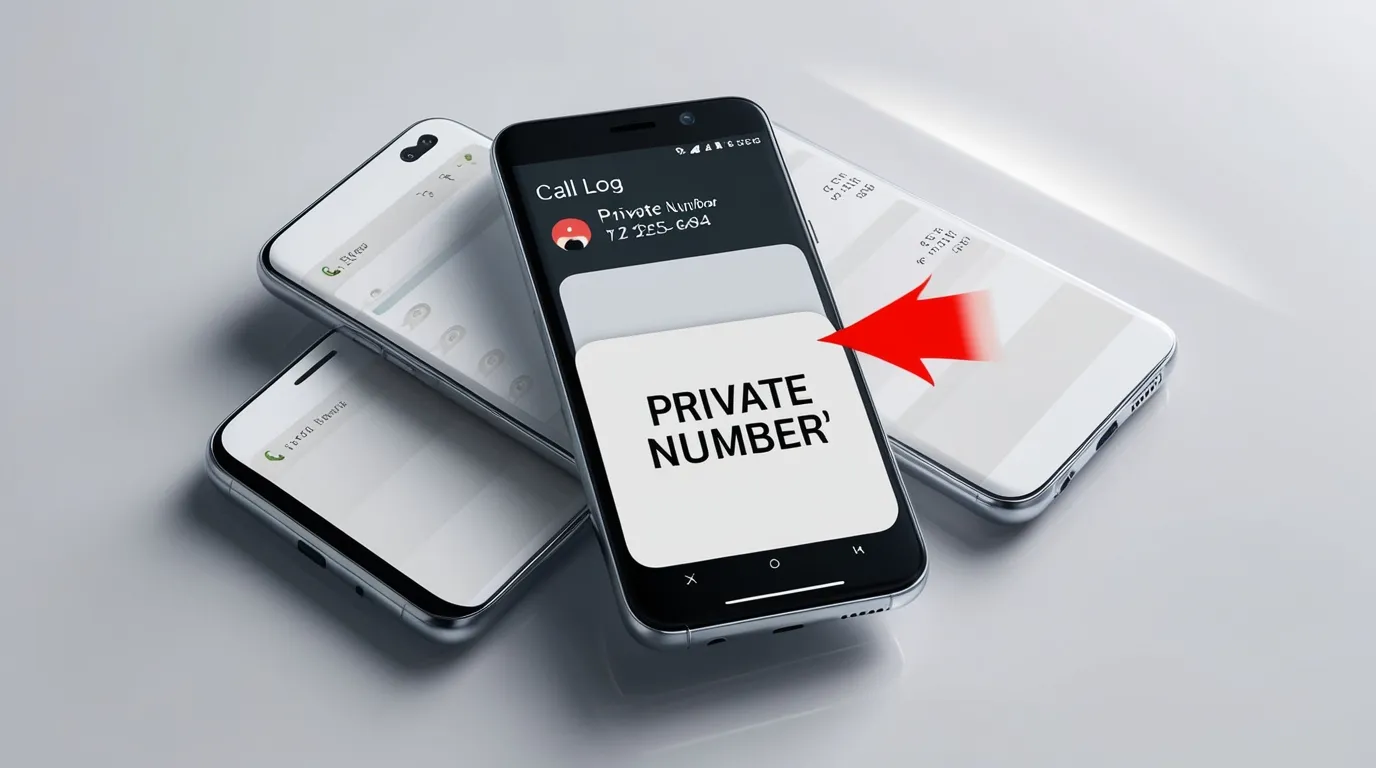
    Private number in Android means that there is a call in which the caller hides or blocks his information. This means that you will not see the number, and instead “Unknown” or “Private Number” will be shown. This happens when the caller hides his number for privacy reasons or there is a problem with the caller ID settings.

    Understanding the Concept of Private Numbers on Android Devices

    Many times your Android phone receives such numbers whose identity is hidden. These could be scammers from whom you need to stay safe or it could be just someone who does not want to show his identity. It depends on whether the call is an IVR call from some company or a call from a scammer. It will always be safe for you to receive calls based on call information. These callers often use your caller privacy settings or the call masking Android feature. Receiving the call is completely up to you—if the number is saved then pick up the call, otherwise ignore it.

    How to Identify Private Numbers on Android Phones

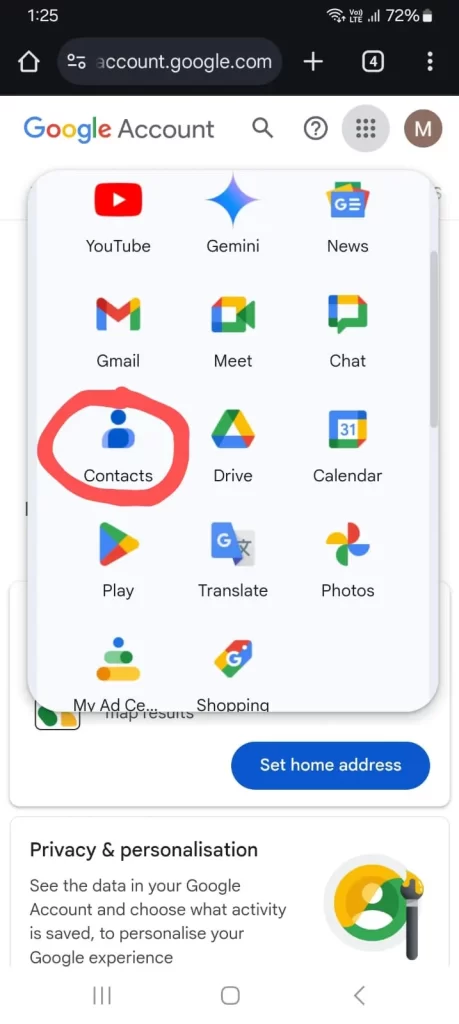
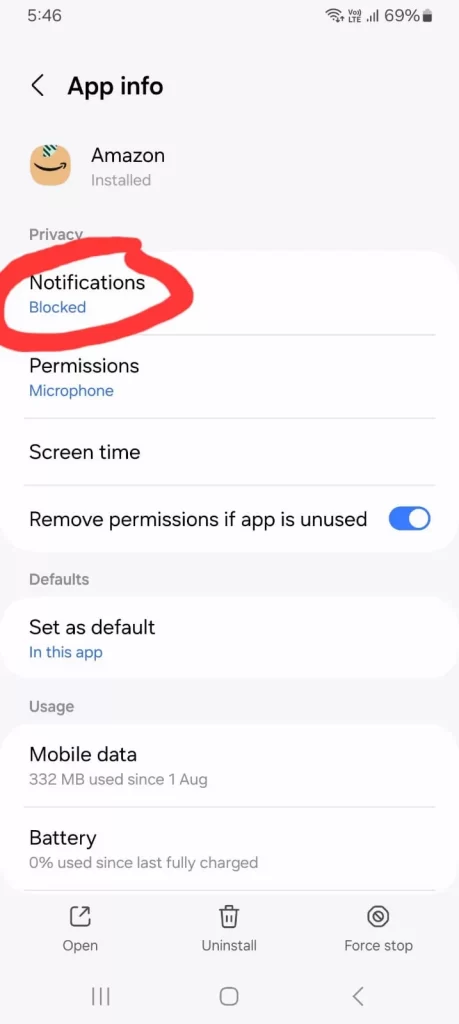
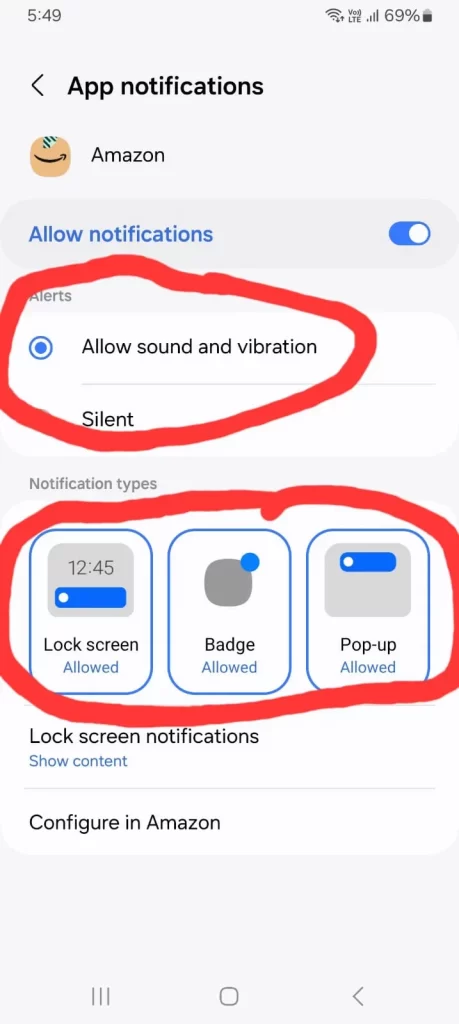
    Many applications related to spam calls in Android phones have come on Google Play Store, through which you can identify your unknown callers. Through these applications, you can easily identify the callers, which gives you a good insight about the caller and you can pick up the call safely. These applications send you notification when a call comes, which is displayed on your Android screen, due to which you get the identity information of the caller on the screen itself. We will suggest you applications from Google Play Store, which you can use to stay safe.

    Why Do You Receive Calls from Private Numbers on Android?

    Any unknown number can come on your Android device, in which the caller makes his own decision, especially those callers like doctors, businessmen, or such people who use their “call masking Android”. By this they hide their identity, so that no other unknown caller can identify them. They do this so that their identity remains safe and no one bothers them. But, apart from these, there can also be some telecaller or scammer who wants to call you and scam you. You can identify and block them with the help of Android applications, so that you can avoid unwanted callers.

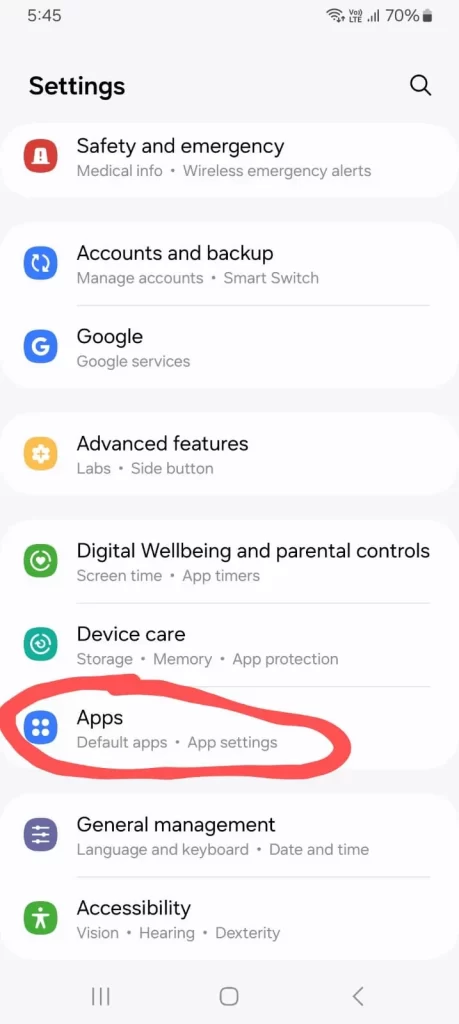
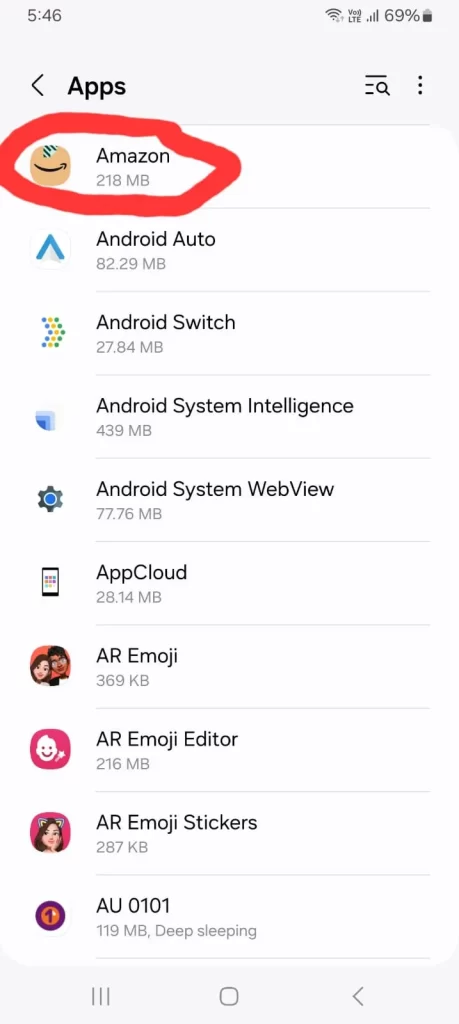
    How to Block or Unblock Private Numbers on Android

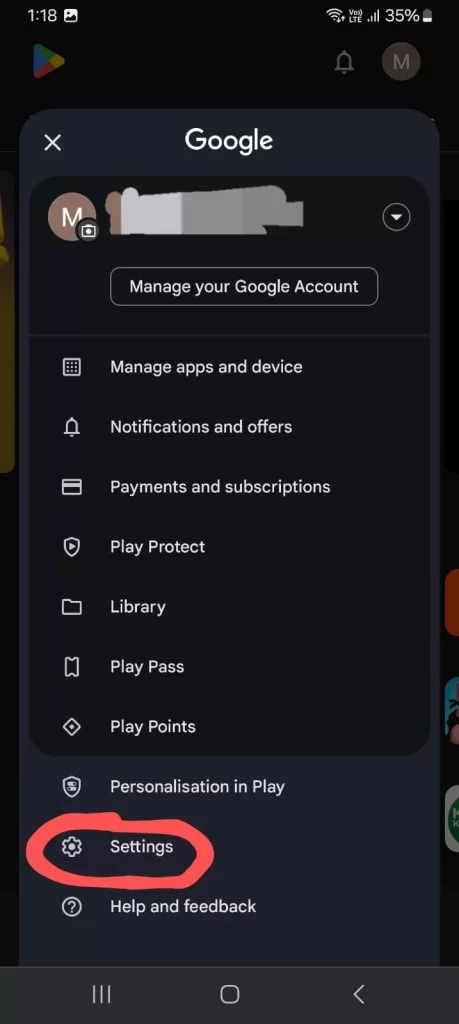
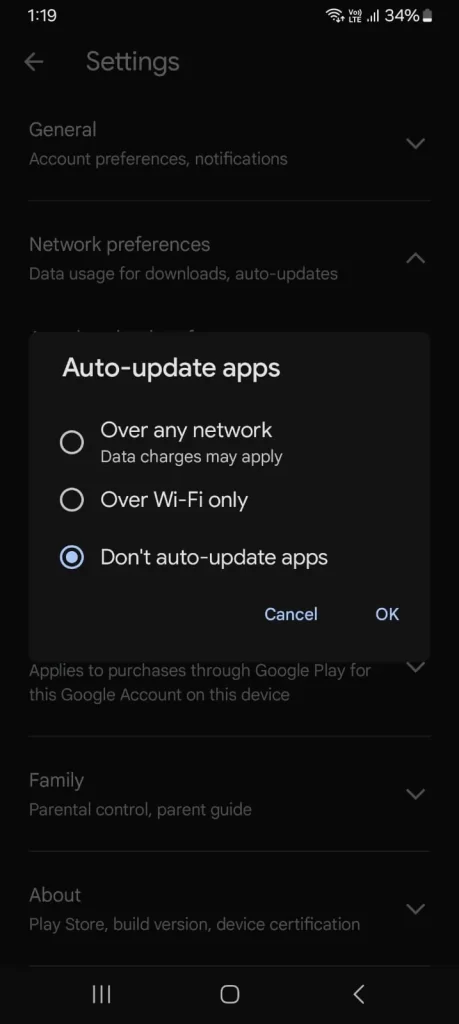
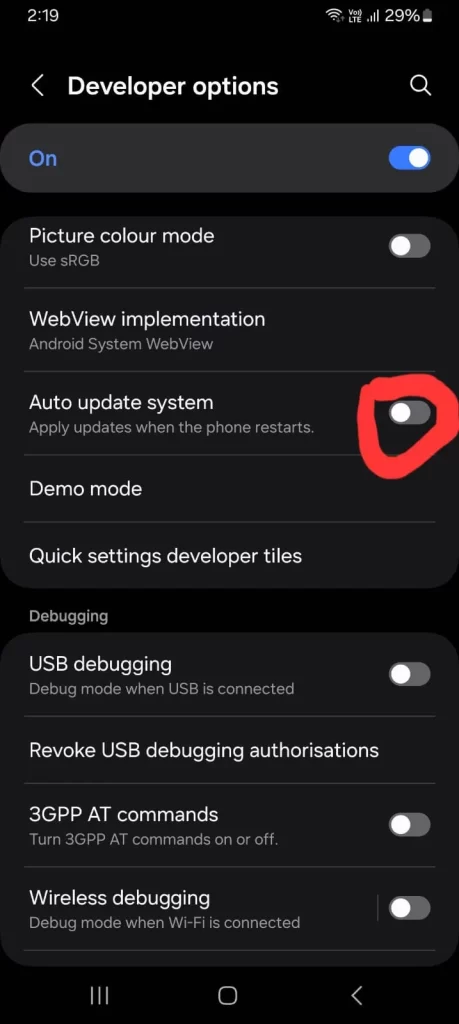
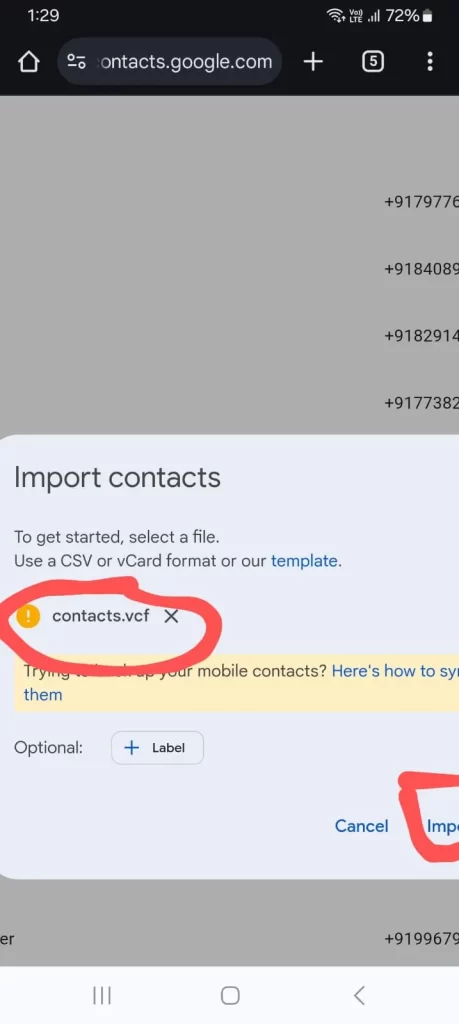
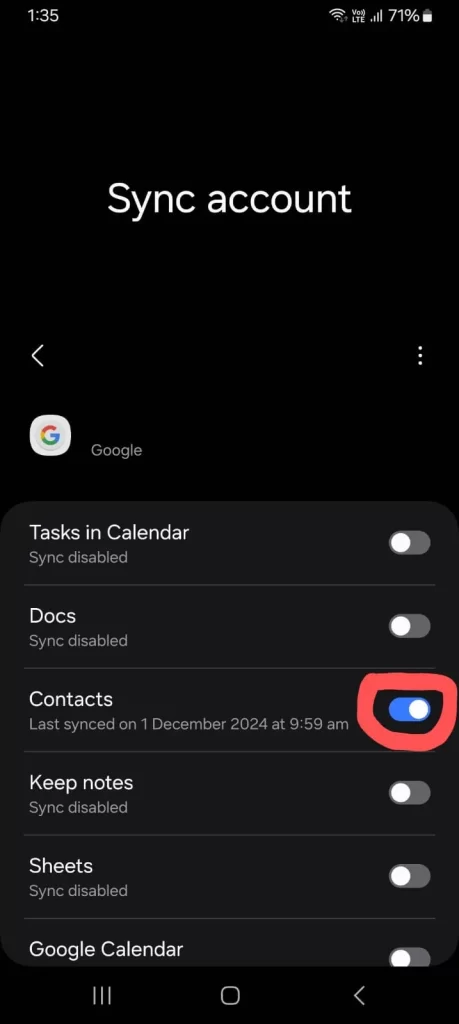
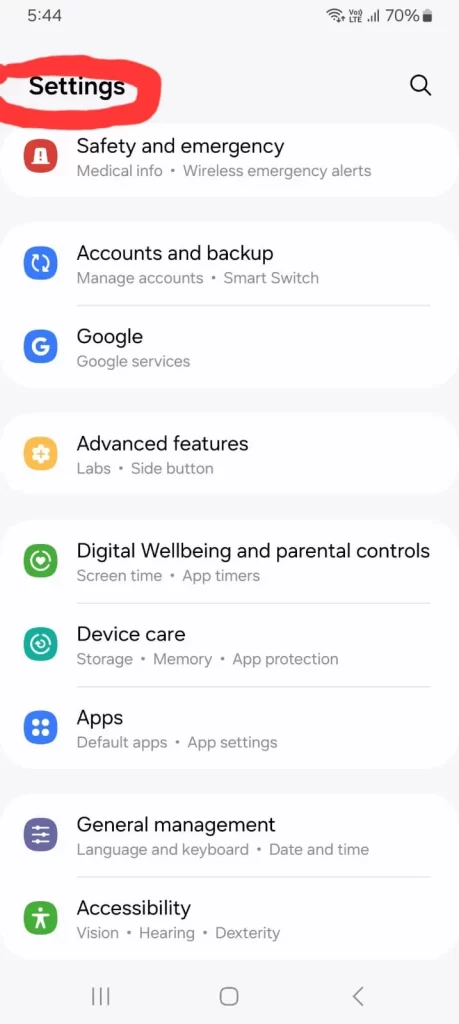
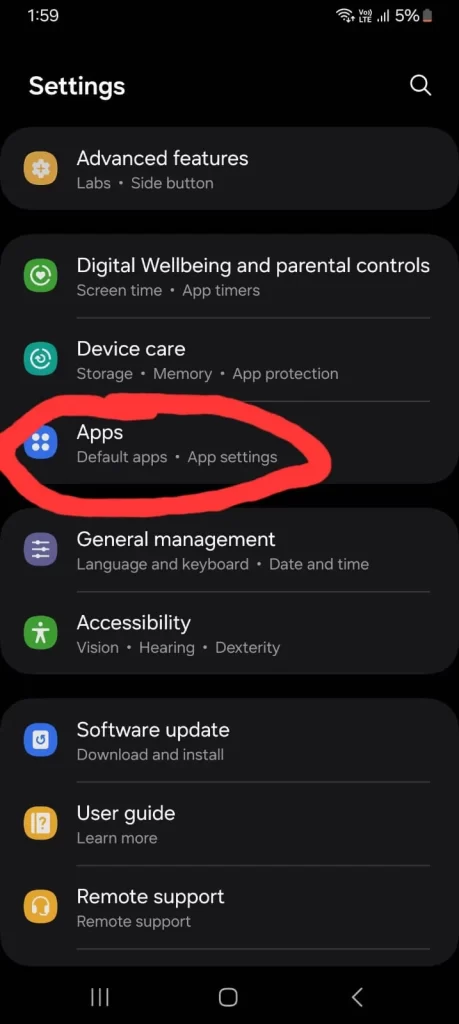
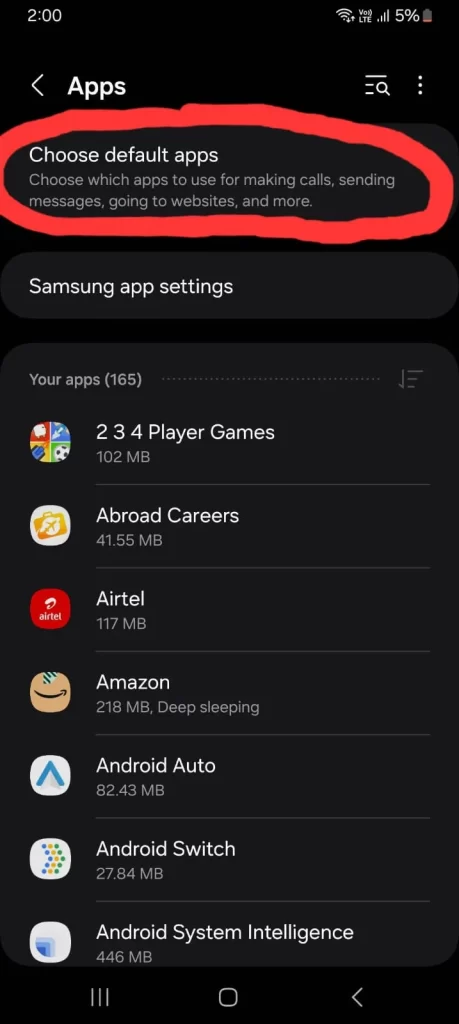
    To block unknown calls you can go to your “manage call settings Android” and block or unblock unknown calls. There you will find the option to block unknown calls, which you need to enable, so that you can avoid calls from unknown callers. By blocking them, calls from unknown callers will stop completely. If you want to unblock a private number, you can unblock it by going to settings. There are also some applications that help you to efficiently manage blocked calls.

    Potential Risks and Precautions When Dealing with Private Numbers on Android

    Some scammers can scam you if you receive a call like unknown calls which we call phishing or fraud. To avoid all this, it is important to strengthen your Android phone’s “phone security Android” so that you can avoid being frauded. Until you are not sure, do not answer any unknown call. Read the above information carefully so that you can stay safe from unknown calls on your Android phone and make smart decisions. Think 100 times before picking up the call.

    Conclusion

    While having a private number on Android can be useful at times, it can also be harmful at other times. Some genuine callers hide their identity or personal information, while some scammers try to deceive you by hiding their identity. With the security features of Android you can strengthen your security. Features like call blocking and caller identification protect you from unwanted calls. Always stay secure and ignore unknown calls, because this is a better option for you, through which you can avoid scammers. Stay educated and keep your Android device secure and safe from unknown numbers by taking necessary precautions.

  • How to Check Voicemail from Another Phone Android

    How to Check Voicemail from Another Phone Android

    Learn how you can avoid missing important messages if you are not available for a phone call. With the Voicemail feature, you can easily access your messages. In this Android Clicks blog, we will show you ways to access remote voicemail and tips to manage your settings efficiently.

    Understanding Voicemail Access on Android Devices

    Accessing voicemail on Android devices is easy. You can also use it remotely if needed. To do this, ensure that your voicemail settings on Android are configured correctly. Confirm with your carrier that remote access is enabled so you can hear your messages from any phone. This process will allow you to manage your voicemail easily.

    Using Your Voicemail Number to Check Messages from Another Phone

    Checking your voice messages is a pretty simple process, just dialing your voicemail number.

    Dial Voicemail Number: Dial your number or your carrier’s specific voicemail access number from any phone.

    Android Voicemail Service: When prompts appear, enter your PIN or password to safely listen to your messages.

    This way you can easily access your voicemail.

    How to Set Up Voicemail for Remote Access on Android

    If you are away from your device, you can easily access your voicemail via remote access so that you can always retrieve your messages.

    • Voicemail Setup Android: Go to your phone’s dialer settings and ensure that your PIN is set for security.
    • Manage Voicemail Remotely: Activate options that let you check messages from another device or phone.

    Click here to read more: How to Create a Label in Gmail on Android

    Alternative Ways to Check Voicemail from Another Phone

    If you don’t find it convenient to access voicemail directly, there are a few alternative methods available:

    1. Voicemail App: Using your carrier’s voicemail application, you can easily check messages from any Android phone using your login credentials.
    1. Voicemail Retrieval Methods: Also make sure your carrier provides voicemail services via email notifications or online access.

    These methods will allow you to efficiently access your voicemails without having to dial directly.

    Conclusion

    With some very simple tips you can manage your voicemail remotely, so you’ll never miss important messages. You can use your voicemail number, an app, or alternative methods, which is a very secure and easy way to get quick access.

  • How Do I Stop Automatic Updates on Android

    How Do I Stop Automatic Updates on Android

    Sometimes automatic updates on Android can trouble you, as your Android phone starts consuming more data and battery. If you want to stop these updates, then definitely read this blog. In this, we will tell you how you can customize the updates in your Android device, which will help you in stopping automatic updates in your Android phone.

    Why Stopping Automatic Updates on Android Might Be Necessary

    Automatic updates keep your Android device up-to-date with security and new features.

    • Control Updates on Android: Avoid automatic updates on your Android phone as they can be problematic for your device, such as storage issues or problems during installation. Always select the option to manually update on your phone, so you can control updates according to your needs and update as needed.

    Keep automatic updates disabled in your phone so that you can allow updates as per your convenience. Read and understand the guidelines, changes, and security features of the updates and then decide whether you want to update or not. It completely depends on you.

    How to Disable Automatic App Updates on Android

    Here we will show you step-by-step how you can control the activity of applications on your Android device:

    1. Go to Google Play Store: In the top corner of the right-hand side you will see the profile icon, click on it to go to your profile.

    How to go to your Google Play Store profile by clicking on the profile icon in the top right corner.

    1. Click on the Settings option: Then go to Settings, go to Network Preferences and click on Auto-update apps.

    How to disable auto-update apps by navigating to Settings and Network Preferences in the Google Play Store.

    1. Select “Don’t Auto-update Apps“: This will disable automatic updates of your Android device.

    Disable automatic app updates on your Android device by selecting "Don’t Auto-update Apps" in the settings.

    1. If you want to control updates of specific apps, you can disable their updates under “Manage Android Apps”.

    Through this manual process you can disable automatic updates in your Android phone.

    Stopping System Updates on Android to Save Data and Battery

    System updates are often running in the background, consuming both your data and battery. You can disable this in your Android phone by following the steps given below:

    1. Go to Settings: Open your settings menu.

    Open the settings menu on your Android device to manage system preferences and updates.

    1. Find System Update Settings: Go to Software Updates > Auto-download over Wi-Fi and turn it off.

    Navigate to the Software Updates section in settings and disable the Auto-download over Wi-Fi option to prevent automatic system updates.

    1. Restrict Background Activity: By following this process you will not let your system processes download without permission.

    After turning off system updates, you can manage your device smoothly and save the battery of your Android phone.

    Using Developer Options to Prevent Automatic Updates on Android

    Developer options give you more control in your Android phone, so you can disable your automatic system updates.

    1. Enable Developer Options: Go to Settings > About Phone > Software Information > then tap Build Number 7 times.

    Enable Developer Options on Android by navigating to Settings, About Phone, Software Information, and tapping the Build Number 7 times.

    1. Access Developer Options: Then go back to Settings, find Developer Options in the menu and click on it.

    Access Developer Options on Android by returning to Settings, locating Developer Options in the menu, and clicking on it.

    1. Disable Automatic System Updates: Disable the Auto-update system option in the list.

    Disable automatic system updates on Android by turning off the Auto-update system option in the settings.

    This will help you easily stop unwanted notifications on your phone that don’t appear frequently.

    Conclusion

    You can easily turn off automatic updates on your Android phone by following this blog of the Android Clicks website. By disabling automatic apps and system updates through this process, you can save both your battery and data, and your phone will remain in better health and will be suitable for long-term use. You have all the options available with which you can customize your Android phone according to your needs and can disable automatic apps or system updates. This will give you good flexibility while using your phone. By using Developer Options, you can smoothen the efficiency of your Android phone and avoid unwanted notifications. Remember, if necessary, you can manually update apps and system features.

  • How to Get Contacts from iCloud to Android

    How to Get Contacts from iCloud to Android

    If you are converting from an iPhone user to an Android user and want to transfer your contacts from iCloud to a new Android phone, then this process is very easy. In this blog, we will guide you step by step so that you can transfer your contacts to Android device easily without any problem.

    Understanding the Process of Transferring iCloud Contacts to Android

    First of all, to transfer your contacts you need to export contacts from iCloud and import them to your Android device. With the help of iCloud contact sync and Android contact import you can transfer all your data quickly and safely. Follow the steps given below to know how we transfer data from iCloud to Android:

    1. First of all login to your iCloud account on your browser.
    1. After that go to the “Contacts” section and select all the important contacts you want to transfer.
    1. Finally, export them to import them to Android phone.

    Using iCloud to Export Contacts to a VCF File for Android

    One of the best ways is to export contacts from your iPhone as a VCF file. Below we will show you the complete setup process step-by-step:

    1. Here we are providing you the link of iCloud where you can login. After logging in, access the “Contacts” section in your account.
    1. Select the important contacts you need and download the file by clicking on “Export vCard”.
    1. Save the VCF file and transfer it to your Android phone.

    Using export iCloud contacts and VCF contact file, you can migrate your important contacts very easily.

    Syncing iCloud Contacts with Google Account on Android

    By syncing your iCloud contacts with your Google account via VCF file, you can automate and make the process easier.

    1. After transferring your VCF file to Android phone.

    VCF file successfully transferred to Android phone

    1. Open your Gmail account on your Android phone and login.

    Logging into Gmail on Android phone

    1. Go to the “Contacts” section.

    Navigating to the Contacts section on Android

    1. Import the VCF file here and click on the “Import” button below.

    Import VCF file and click on the import button to transfer contacts on Android

    1. Enable Google account sync in your Android phone’s settings so that your contacts are easily accessible.

    Enable Google account sync on Android to access contacts easily

    Now you can see that iCloud contacts have been successfully transferred to your Android phone.

    If you find the manual process complex and time-taking, you can do it quickly and easily using some tools. Below we will suggest you Google trusted applications through which you can transfer your contacts from iPhone to Android phone quickly and easily:

    Using Third-Party Apps to Transfer Contacts from iCloud to Android

    These applications make the iCloud to Android contacts transfer process very easy, in which you get features like direct sync and selective transfer.

    Conclusion

    You may find these methods a bit manually challenging initially, but these methods will be quite effective for you. You can also do this process easily using third-party applications. All the information given above is quite effective, which will help you to transfer your contacts from iCloud to Android device. Follow all the steps given in this blog and transfer your contacts from iPhone to Android without any problem. Choose the method that suits you best and enjoy your transition to the fullest. For more information, visit our Android Clicks website and improve your Android experience!

  • How to Bypass Screenshot Block Android

    How to Bypass Screenshot Block Android

    If you have tried to take a screenshot in any application on an Android phone, you may have received a block message or you may have failed to take a screenshot. This means that there are built-in restrictions in the application which prevents you from taking screenshots, so that your privacy can be taken care of. But if needed, there are many ways to bypass this block. In this blog, we will guide you how you can take screenshots safely and comfortably, without this restriction, and also take care of privacy.

    Understanding Screenshot Blocking on Android Devices

    Screenshot blocking is a security feature on Android devices that some applications use to protect your sensitive data. Many applications are using this security feature nowadays, such as banking, payment, and streaming apps. All these apps restrict screenshots so that no one can capture and know your personal information, such as password or account details. Its motive is to ensure your privacy protection on Android, and through this protection your private data remains strongly secure.

    Why Some Apps Block Screenshots on Android

    Many applications use your privacy protection on Android devices as a safeguard. This way you can prevent data leakage, i.e. data theft, so that your personal account details or pension identity do not fall into the hands of any thief. These apps protect you from all these things through the screenshot block protection feature.

    How to Safely Bypass Screenshot Block on Android

    If you have a genuine requirement or very urgent work and need to bypass the screenshot block in Android app, then do it. We have found a tool which is a very popular tool according to our research, with the help of which you can use as per your genuine requirement. Its name is “workaround for screenshot block.” You have to use this tool very carefully, at your own risk, so that none of your information is exposed to anyone. Use this tool only for genuine work, and remember, so that no fraud happens with you in the future. If you need to bypass the screenshot block in the Android app as per your genuine requirement, then you can use a very famous and popular tool named “workaround for screenshot block.” But when you use this tool, you must use it after fully understanding its risk, so that no personal data or information gets exposed or leaked from your phone. If you use it, then use it only for your urgent and genuine work and use everything after understanding everything.

    Disclaimer: If you want to use this popular tool, you can do so at your own risk. If you are using this tool for legal purposes or for any urgent requirement, you can do so. We are here to help you, but we do not support any illegal activity or violation. We prioritize the safety and security of our valuable users.

    Alternatives to Taking Screenshots on Android

    If you need to do some other safe activity besides bypassing, you can record your screen using screen recording on an Android device, if the application supports it. Another way is to use Google Notes, where you can write your data after viewing it manually. I am giving you the link to “Google keep” notes here, from where you can use this tool to store your private data securely. This is a good method, time-taking, but it is a good practice for you, and we all highly trust Google products and always depend on them. Another solution is to take cloud service, where you can store your content. This is highly recommended from our side, which is safe and secure for you and your family.

    Conclusion

    Just a piece of information—take it positively, and it depends on you whether you want to use this tool or not. We hope that we have covered and clarified everything about this popular tool above.

    If you want to bypass the screenshot block, we have 3 recommendations:

    1. Google Keep Notes – where you can securely store your data by manually viewing and writing it down.
    1. Cloud Services – where you can securely save your content.
    1. Screen Recording – if the application allows, you can save your information through screen recording.

    All these methods are safe and take care of data privacy. By using them you will remain secure and safe. We are giving this information only to educate you.

  • How to Allow Push Notifications on Android

    How to Allow Push Notifications on Android

    In Android phones, you can easily get important information about your Android and third-party apps through push notifications. First of all, you have to go to the settings of your Android phone, select the application in the apps section for which you want notifications and enable push notifications. This way, you will not miss any offer or message. In this blog, we will guide you, so that you can easily enable push notifications and your Android experience can be better.

    Understanding Push Notifications and Their Importance on Android

    This is an alert message that you get through push notifications on your Android phone. This real-time communication is very important for notifications like you get updates on social media activities, application updates, offers, news, and similar things. It increases your engagement and improves your performance. That’s why we want you to always stay updated and connected so you can get updated with push notifications related to your work and also stay updated on other activities like entertainment news, etc.

    How to Enable Push Notifications for Specific Apps on Android

    Here we will guide you how you can enable push notifications for your favorite apps or useful apps, or any apps that you find useful. You can easily enable push notifications by following the steps given below:

    1. Go to the settings of your Android phone.

    Opening the settings on Android phone

    1. Scroll down and click on the option of “Apps“. As soon as you click on “Apps“, you will see many applications.

    Accessing the "Apps" section in Android settings to view all applications

    1. Click on whichever application you want push notification for.

    Selecting an app for push notifications in Android settings

    1. Then you will see the first option of “Notifications“, click on it.

    Accessing the "Notifications" settings for an app in Android

    1. After that the button of “Allow Notifications” will appear, allow it.

    Enabling push notifications for an app on Android device

    Customizing push notification preferences (sound, vibration, lock screen, pop-up) on Android

    1. Then you can see what type of push notifications you want, like “Allow Sounds and Vibration” or “Silent” — it will depend on your preference. Below you will also get the option of what type of notifications you want, like “Lock Screen“, “Badge“, and “Pop-up“. Select the one that suits you best. 

    By following these steps, you can turn on your push notifications.

    Conclusion

    In a simple way, you can easily enable push notifications on your Android device and make your work or daily life easier with important notifications. Push notifications provide you real-time updates, which helps you to stay updated always.

    You can also customize notifications according to your needs in Android phone settings, so that you can see your priority tasks first and disable those notifications which are not important for you. This way you can save your time and stay away from distractions.

    By following this knowledge, you can make your Android experience much better and productive by making the best use of push notifications.

  • How to Record Audio from YouTube on Android

    How to Record Audio from YouTube on Android

    Recording audio from YouTube on your Android phone can be very useful, especially when you want to save your podcasts, music, and other content offline. In this guide, we’ll show you how you can legally record YouTube audio on your Android phone. There are also plenty of third-party applications we recommend you use below, and there’s another option that’s available on many Android phones. If your phone has this feature built-in, you can use it to troubleshoot problems.

    Before recording audio from YouTube, you must ensure that you are recording audio on your Android phone with legal and ethical understanding. As you know, YouTube videos are often copyrighted, which means you cannot make any licensed content your own without permission. If you use content without the permission of the original content creator, you are violating copyright laws.

    Always follow YouTube’s guidelines to avoid copyright issues. If you want to download or record content, first confirm that the content you want to record is legally available or comes under the Creative Commons license. This way, you can safely and ethically download or record your favorite music without any violation.

    Using Built-in Features on Android to Record Audio from YouTube

    Many Android phones have built-in recording features that let you record system sounds, such as YouTube audio. To use it:

    • Check your Android phone to see if your device has a native screen recorder that supports audio capture.
    • First, open the YouTube video you want to record.
    • Click on the recorder to enable it and select internal audio as the source.

    Best Third-Party Apps for Recording YouTube Audio on Android

    If your Android phone doesn’t have built-in features, you can record YouTube audio using any third-party app. We suggest some of the best YouTube Audio Recorder apps: Audio Recorder and Hi-Q MP3 Recorder. Using these two apps, you can select and record your favorite audio.

    Another option is AZ Screen Recorder or Mobizen, which lets you capture video along with audio. All these apps are user-friendly, meaning they are quite easy to operate, and provide high-quality recording, which helps you capture YouTube audio.

    You can download these apps from Google Play Store.

    Step-by-Step Guide to Record Audio from YouTube on Android

    Here are some very simple steps that will help you record YouTube audio on your Android phone easily.

    1. Go to Google Play Store and install the YouTube Audio Recorder app, otherwise you can also use your built-in recorder.
    1. Second, open the YouTube audio and pause at the starting point of that audio, whatever you like and want to record.
    1. Third, launch the recorder and start recording while playing the video.
    1. Fourth, once the audio is recorded, stop the recording.
    1. Fifth, save the file and check the quality of the recorded audio once again, so that you can successfully capture audio on your Android phone.

    Troubleshooting Common Issues When Recording Audio on Android

    While recording YouTube audio, you may face some issues. Here we are giving you some tips which will help you solve your Android recording problems quite easily.

    • If your screen recording is not working, first check if the app’s permission is enabled or not. First of all, enable the permission of your app. Then you should delete some unnecessary or useless files on your device. Freeing up space will help a lot in running screen recording on your Android phone.
    • If you are facing a problem of low quality audio, then you should use a good application from Google Play Store which can give you high quality audio.
    • If there is no internal audio or internal sound option in your Android phone, then you can use a third-party app where you will get the option of internal audio or internal sound. Then you can record audio by using YouTube audio.

    By following these tips you can easily solve your audio recording issues.

    Conclusion

    Recording audio on YouTube can be very helpful on Android, especially when you need to save songs, podcasts, or other content offline. The most important thing is that you pay attention to legal and ethical guidelines to avoid copyright violations. You have a lot of options on Android — you can use third-party apps or use built-in features. Always choose the best option according to the situation. If you have the right and best method, make it your first priority and by troubleshooting common issues you can easily get high-quality recordings. You should always respect the rights of content creators so that you can make an informed choice when you record audio on YouTube.

  • How to Download Music from Spotify to Android Phone

    How to Download Music from Spotify to Android Phone

    Downloading music from Spotify is a great way to listen to your favorite songs anywhere, even if you are offline. Spotify’s offline mode gives you the opportunity to listen to your playlists without an internet connection. In this blog, we will tell you how you can download your favorite songs and enjoy them anytime.

    Understanding Spotify’s Download Feature on Android

    Spotify gives you the feature to download songs, which is a good opportunity in areas where connectivity is low. You can listen to your songs offline, that is, by downloading, where you can access your playlists, albums, and podcasts. To enjoy music offline, simply download music on your Android phone and then you are ready to listen to your favorite songs.

    How to Set Up Spotify for Music Downloads on Android

    Before downloading music, you need to properly configure the settings of the Spotify app on your Android phone. First, open the Spotify app, then go to Settings and turn on the Android music download option. You can also easily choose the quality of the music you want to download, depending on your storage preferences. This simple setup helps you easily listen to offline music on your Android phone, and you can also save your favorite songs and albums.

    Step-by-Step Guide to Download Music from Spotify to Android

    1. Open the Spotify application on your Android phone.

    Launching the Spotify app on Android phone

    1. Next, search for your favorite songs or any songs you like according to your choice.

    Searching for songs on Spotify app on Android phone

    1. Then, click on the 3 dots on the top right-hand side.

    Tapping the 3 dots on the top right of the Spotify app on Android

    1. You will see the first option “Add to other Playlist” where you can add your favorite songs. As soon as you click on the 3 dots, you will see the “New Playlist” option on the top. You can create your playlist by clicking there. I am naming my folder “Favorite Songs” here and you can name it as per your choice.

    Selecting the "Add to other Playlist" option to add songs in Spotify on Android

    Creating a new playlist named "Favorite" in Spotify on Android

    1. Then, click on the “Create” button to create your playlist.

    Creating a new playlist by clicking the "Create" button in Spotify on Android

    1. You will see an interface like this, where you have to click on “Add to this Playlist“. Then, you will see more songs as suggestions which you like, you can add them to your playlist, or you can search and add your favorite song from the top search bar. I am adding the first two songs.

    Adding songs to a playlist or searching for songs in Spotify on Android

    1. Then you have to go back to your phone.

    1. Now you will see these 3 added songs.

    Viewing the 3 added songs in your playlist on Spotify for Android

    The next step is to download them so that we can listen to our favorite songs offline.

    1. Now, click on the “Download” icon button and you will see the green button of “Explore Premium“. Click there.

    Clicking the “Download” icon and “Explore Premium” in Spotify on Android

    1. Now you can choose your required plan. Click on the “Get Premium Individual” button.

    Selecting the “Get Premium Individual” plan in Spotify on Android

    1. Here you can see the best premium plan of Spotify. If you want to purchase, then click on the “Continue with Spotify” green button and enjoy your offline songs. You can also download your “Favorite Songs” playlist.

    Purchasing Spotify Premium and downloading the “Favorite Songs” playlist for offline use

    By following these steps, you can enjoy your favorite songs offline!

    Managing Your Spotify Music Downloads on Android

    When you download a lot of music on your Android phone, managing offline content becomes very important. You can easily manage your offline songs by going to Spotify settings and selecting the downloads section.

    If you don’t want any track or album, you can free up space on your Android phone by deleting it. This way, your Android phone will run smoothly and you can enjoy your favorite songs without any hassle.

    Conclusion

    Downloading music from Spotify to your Android phone is a very easy and great way to enjoy your favorite songs even without an internet connection, i.e. in offline mode. This is a great option that gives you the experience of listening to songs offline.

    In offline mode, you can easily create playlists and experience a smooth and great process with features like music quality customization. If you set up Spotify well and manage your downloads, your experience becomes even more seamless.

    Whether you are at home, traveling, or in areas with low connectivity, Spotify gives you the freedom to enjoy your favorite music anywhere and anytime. Follow these steps and enjoy your favorite songs!

  • What Is QuickStep on Android Phone?

    What Is QuickStep on Android Phone?

    Android phones have a default launcher called “Quickstep” that helps users navigate the device’s app drawer and recent apps. It is designed in such a way that users can seamlessly switch between apps and get an easy way to perform actions on the Android device.

    Understanding QuickStep: The Default Launcher on Android

    The Android launcher is a very important part of your phone’s interface, which manages the home screen and app interactions. As I explained above, QuickStep is the default launcher that provides users with a seamless integration with Android’s core features. Whether you’re customizing apps on your phone or navigating through apps, QuickStep provides an experience that’s specially designed and optimized for Android devices, based on user needs.

    How QuickStep Enhances Your Android User Experience

    QuickStep improves the Android user interface from normal functionality to a modern design and enhanced usability. Like with the help of the custom gestures feature of swipe, you can access recent apps or quickly switch screens. This lets you do your daily important tasks quickly and efficiently. This feature helps you to do more work in less time and completes the work smoothly.

    Features of QuickStep on Android Phones

    QuickStep has many key Android features that give you a smooth and great experience:

    • Home screen customization: In this, you can easily arrange your apps and widgets where you want, according to your needs.
    • Integrated gesture navigation: In this feature, you can access apps or do many tasks together very easily, which saves your time and gives you a good experience.
    • Google Feed integration: You can access personalized updates directly from your home screen.

    With all these features, QuickStep gives users a next-level experience with Android devices.

    How to Customize QuickStep on Your Android Device

    To customize QuickStep as per your needs, follow the steps given below:

    • Leave the Home app on your phone and long press anywhere on the screen.
    • Then you will see some options on the screen, like Wallpaper and Style, Themes, Widgets, and Settings. You can choose any of these options.
    Selecting options such as Wallpaper and Style, Themes, Widgets, and Settings on Android
    • If you want to change your Android launcher, go to Settings > Apps > Default apps > Home app and select an alternative launcher of your choice.

    Here I am going to tell you which launcher is best for us and how it helps us in becoming more productive on a daily basis. I am also going to show you the steps to set up the default launcher in detail.

    1. First go to Google Play Store and install Microsoft Launcher app.

    Installing Microsoft Launcher from Google Play Store on Android

    1. As soon as you open the application, just click on the “Get Started” button.

    Clicking on the “Get Started” button in Microsoft Launcher on Android

    1. Choose your wallpaper and click on the “Continue” button.

    Selecting a wallpaper and clicking Continue in Microsoft Launcher on Android

    3. If you have a Microsoft email account, sign in; if not, you can skip the sign in process. After clicking on the “Next” button, you will see two options: “Not Now” and “OK”. Click on the “Not Now” button.

    Signing in with Microsoft email or skipping sign-in, then clicking "Not Now" in Microsoft Launcher on Android

    4. Now you will see the “You are All Set” page, and at the bottom you will find the “Let’s Go” button. Just click on it.

    Clicking the “Let’s Go” button on the “You are All Set” page in Microsoft Launcher on Android

    Now, we will show you how you can setup the installed Microsoft Launcher on your Android phone:

    1. Go to your phone’s settings. There you will see the “Apps” option, click on it.

    Navigating to the "Apps" option in phone settings on Android

    1. In the Apps section you will find the “Choose Default Apps” option, which we have marked in the snapshot. Click on it.

    Clicking the "Choose Default Apps" option in the Apps section on Android

    1. Now you will see the “Home App” option, click on it.

    Selecting the "Home App" option in Android settings

    1. Here you will get two options: Microsoft Launcher (which we have downloaded) and One UI Home (inbuilt phone launcher).

    Selecting Microsoft Launcher or One UI Home in the Home App settings on Android

    1. Click on Microsoft Launcher, and now your Android phone’s launcher has been successfully changed.

    Changing the Android phone’s launcher to Microsoft Launcher

    Conclusion

    QuickStep is a very important part of Android devices which gives users a very effective experience. This default launcher helps you a lot in navigation, customization, and multitasking so that your work becomes easier and you can get more work done in less time. This makes it easier for you to use applications and also gives good performance. With features like home screen customization, gesture navigation, and Google Feed integration, you can use your Android phone smoothly. QuickStep provides you with a modern interface, which is well designed keeping in mind your Android needs, so you can easily use QuickStep in Android devices.

    If you want more productivity and personalization, customizing QuickStep or switching to another launcher, like Microsoft Launcher, can improve your Android experience. By following simple steps you can set up your device to your needs, making your phone more efficient and enjoyable. Whether you’re navigating apps or customizing your home screen, QuickStep optimizes your Android experience for both functionality and style.

  • Where Are Text Messages Stored on Android?

    Where Are Text Messages Stored on Android?

    In Android, the phone stores text messages in the internal storage or within the messaging app’s database. These are easily accessible through your messaging application.

    Once you locate the folder, you can easily export and recover the relevant data i.e. deleted Android text messages.

    You can watch the video in the second-to-last header below, which explains how to see where text messages are stored on Android.

    How Android Devices Store Text Messages

    Android SMS storage depends on your messaging application, but it is in a very secure directory, which is not directly accessible without permission. This storage method helps you save, protect and better manage your messages.

    Locating Text Messages on Your Android Phone

    You can view the texts saved in the application by opening your messaging application. If you need advanced access, use an Android file manager application. SMS file storage requires root access. You can check by going to your SMS app’s settings, where you will find backup and storage options, which allow you to export and view messages easily. In most cases, the messaging app itself is enough to access text messages.

    How Android Organizes and Saves Your Text Messages

    Android saves texts in a structured format. A message database stores conversations in the form of SQL databases, which we can access only through the system or a special application. This organization ensures that all messages can be recovered quickly, so that your messaging app can operate and handle smoothly.

    Using Backup Options to Save Text Messages on Android

    Backing up texts helps prevent data loss. Use tools like Google Drive to back up SMS on Android. There are also some third-party apps on the market, like SMS Backup & Restore, that offer flexible options to save and easily export messages. With daily backup, you can easily restore your text messages on a new device or after a factory reset. Automating backups makes it easy so your messages are always secure.

    Accessing Archived or Deleted Text Messages on Android

    You can recover deleted or lost texts with better tools. You can use applications like Dr.Fone or Tenorshare, which are specialists in message recovery, to recover your deleted texts. Play Store link:

    For your archived texts, check the archive folder of the SMS app once if it is available.

    Recovery success also depends on the time when you deleted your texts, and the chance of recovering data depends accordingly. Therefore, before recovery, remember when you deleted your texts, and also try to know whether they have been overwritten in the storage or not. Taking quick action increases the chances of recovering your lost messages.

    Where Android Stores Text Messages Location, Backup, Recovery, etc.

    Click here to watch the video “Where Text Messages Stored on Android”:

    Conclusion

    In Android, text messages are stored in the internal storage or the messaging app’s database. You can easily access them from your messaging app. If you want to recover deleted messages, you can recover them by using better tools.

    The SMS app also has backup and storage options that help to export and view messages. With backup tools like Google Drive and SMS Backup & Restore, you can securely save your texts and restore them after a new device or factory reset.

    If you want to recover deleted messages, you can easily recover them by using tools like Dr.Fone and Tenorshare.