Author: Aman Iqbal Shaikh

  • How to See WiFi Password on Android?

    How to See WiFi Password on Android?

    Sometimes it happens that you forget the password of the WiFi connected to your Android phone, and need the password to connect to another device. The good thing is that it is possible to see WiFi passwords on Android devices, but this process can be a bit tricky. Here we will guide you step-by-step.

    Why Would You Need to See a WiFi Password?

    • Forgotten Passwords: If you have forgotten the WiFi password and want to connect to a new device.
    • Share with Friends and Family: To share WiFi access with someone else.
    • Troubleshooting: If you are resetting WiFi settings and need the password.

    Methods to See WiFi Password on Android

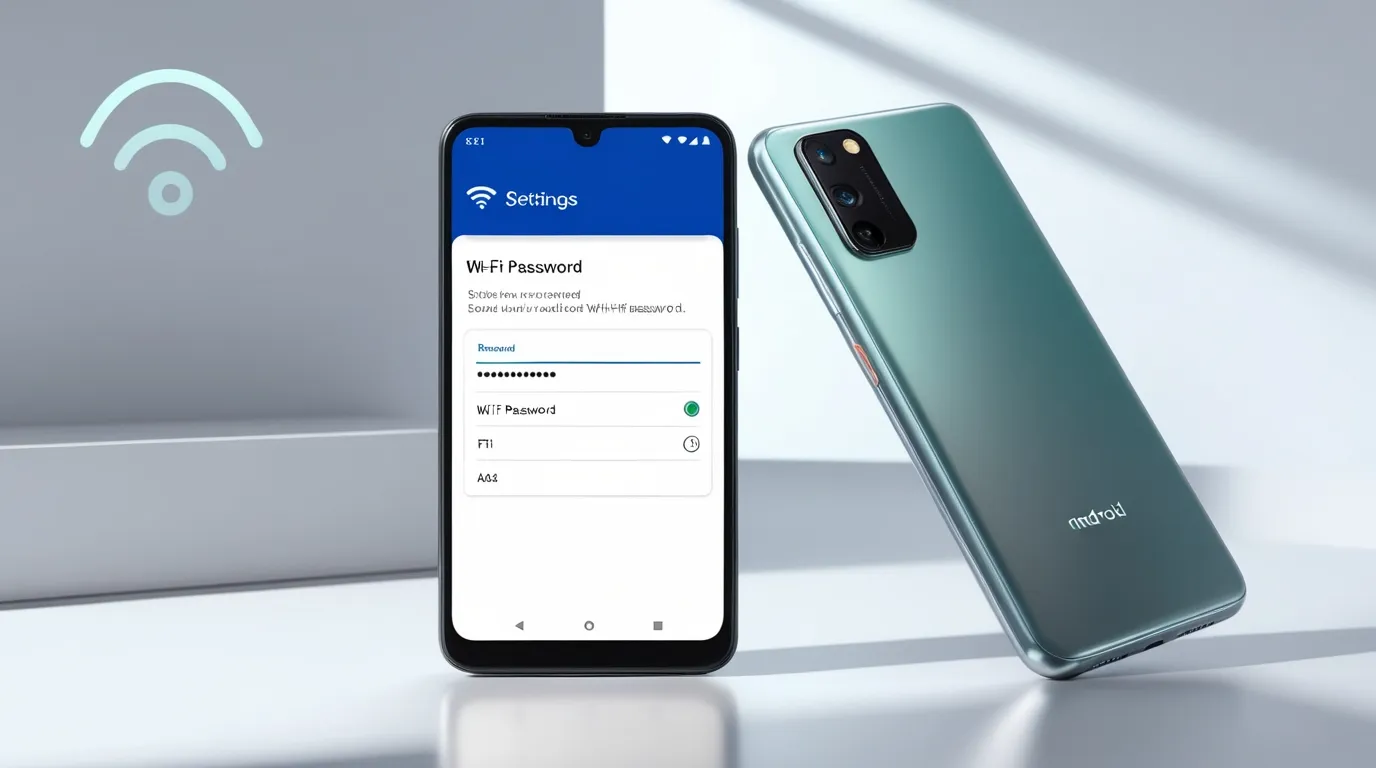
    Method 1: Using Phone Settings (Android 10 and Above)

    1. Open Settings: Go to “Settings” of your Android phone.
    2. Go to WiFi Options:
      Select “WiFi” in the “Network & Internet” or “Connections” section.
    3. Select the Connected Network:
      Tap on the WiFi network that is currently connected.
    4. View QR Code:
      Tap on the “Share” option. You will see the WiFi password along with the QR code.
      Note: The password is in plain text below the QR code.

    Method 2: Using a File Manager (Rooted Devices)

    1. Enable Root Access:
      If your device is rooted, you can access the WiFi password files.
    2. Download a File Manager:
      Use a file manager that can access root files, like “ES File Explorer.”
    3. Go to WiFi Configuration File:
      Open the /data/misc/wifi/wpa_supplicant.conf file.
    4. Find the Password:
      Your WiFi password will be mentioned next to “SSID” and “PSK” in the file.

    Method 3: Use Third-Party Apps

    1. Download Trusted App:
      Download apps like “WiFi Password Viewer” from Google Play Store.
    2. Grant Permissions:
      Give the app root access or necessary permissions.
    3. View Saved Passwords:
      The app will show you a list of your saved WiFi passwords.

    Tips for Viewing WiFi Passwords Safely

    • Use Trusted Sources:
      Use only authentic apps or settings, third-party apps can have privacy risks.
    • Keep Password Secure:
      Do not share WiFi password with any unsafe location or unauthorized person.
    • Update Android:
      Using the latest Android version is helpful for features and security.

    Pros and Cons of Viewing WiFi Passwords on Android

    Pros:

    • Convenience:
      You can quickly connect a new device to WiFi.
    • Sharing Made Easy:
      You can easily share passwords with friends or family.

    Cons:

    • Security Risks:
      Using rooted devices or third-party apps can be risky.
    • Complexity for Older Versions:
      The process is complicated on devices before Android 10.

    Viewing WiFi password can be a simple process if you use the latest Android version. By following the above methods, you can access the password of your connected networks, but always keep privacy and security in mind!

  • How to Screenshot a Snapchat on Android

    How to Screenshot a Snapchat on Android

    Snapchat is a fun app for sharing moments that disappear quickly, but sometimes you might want to save a snap or chat for later. Whether it’s for memories, important details, or professional reasons, you can safely take a screenshot while being mindful of Snapchat’s privacy rules.

    Why Take a Screenshot on Snapchat?

    • Save Important Info: Need to keep an address, event details, or a hilarious snap? Screenshots can help.
    • Capture Special Moments: Some snaps deserve to be cherished forever.
    • Document for Work: Sometimes, business conversations on Snapchat need to be saved.

    Easy Ways to Screenshot a Snapchat on Android

    1. Use Your Phone’s Screenshot Feature

    • Step 1: Open the snap or chat you want to save.
    • Step 2: Press the “Power” and “Volume Down” buttons at the same time.
    • Step 3: Keep in mind, Snapchat will notify the sender if you use this method.

    2. Take a Photo with Another Device

    • Step 1: Open Snapchat and display the snap on your screen.
    • Step 2: Grab another phone or camera and snap a picture of the screen.
    • Step 3: This method keeps it private—Snapchat won’t send a notification.

    3. Record Your Screen

    • Step 1: Use your phone’s built-in screen recorder or download a third-party app.
    • Step 2: Record the snap or chat as it plays.
    • Step 3: After recording, pause the video at the right moment and take a screenshot.

    Heads up: In some cases, Snapchat can detect screen recording and notify the sender.

    Things to Remember

    • Respect Privacy: Always ask the sender’s permission before taking a screenshot—it’s the right thing to do.
    • Use Screenshots Responsibly: Avoid misusing screenshots to protect your reputation and relationships.
    • Understand Notifications: Snapchat’s built-in methods notify the sender when you capture their content.

    Pros and Cons of Screenshots on Snapchat

    Pros

    • Save Key Details: Screenshots help you keep important snaps for later.
    • Quick Access: Once saved, you can view them anytime you want.

    Cons

    • Privacy Concerns: The sender might feel uncomfortable if they get notified.
    • Risk of Misuse: Using screenshots inappropriately can harm trust.

    Taking a screenshot on Snapchat doesn’t have to be tricky. By choosing the right method and being respectful of privacy, you can save the snaps you need without any hassle. Always remember—clear communication and consent go a long way in building trust.

  • How to Back Up Text Messages on Android to Computer?

    How to Back Up Text Messages on Android to Computer?

    To ensure the safety and accessibility of important text messages, they can be backed up to a computer. This protects against data loss due to accidental deletion or phone issues. The step-by-step process for backing up Android text messages on a computer is outlined below.

    Why Should Text Messages Be Backed Up to a Computer?

    • Prevention of Data Loss: If messages are deleted or the phone is damaged, important messages remain secure.
    • Phone Storage Is Freed Up: Storage space can be saved after the backup is completed.
    • Hassle-Free Transfer to New Phone: SMS messages can easily be transferred to a new phone.
    • Long-Term Record Keeping: Business and personal conversations can be stored permanently.

    Methods to Back Up Text Messages on Android to Computer

    Method 1: The SMS Backup & Restore App Is Used

    1. The App Is Installed: The “SMS Backup & Restore” app must be downloaded and installed from the Google Play Store.
    2. The App Is Opened: The app should be launched, and necessary permissions granted.
    3. A Backup Is Created:
      • The “Set Up a Backup” option must be selected.
      • “Messages” should be chosen as the data type.
      • Google Drive, Dropbox, or local storage can be selected as the backup location.
    4. The Backup File Is Transferred to the Computer:
      • If the backup is saved in local storage, the phone must be connected to the computer using a USB cable.
      • The backup file can then be copied to the computer.

    Method 2: A Google Account Is Used

    1. Google Backup Is Enabled:
      • “Settings” > “Google” > “Backup” must be accessed, and the “SMS Messages” option enabled.
    2. Google Drive Is Accessed:
      • Google Drive should be opened on the computer, and the synced SMS backup downloaded.

    Method 3: Third-Party Software Is Used

    1. Data Backup Software Is Downloaded: Software like “Droid Transfer” or “Mobikin Assistant for Android” must be installed on the computer.
    2. The Phone Is Connected: The phone should be connected to the software using USB or Wi-Fi.
    3. The Backup Process Is Completed: The SMS backup option in the software should be used to save messages on the computer.

    Tips for Safe Backup

    • A Secure Location Is Chosen: Backup files must be saved in a safe folder or external drive.
    • Regular Backups Are Taken: Periodic backups should be created to maintain updated data.
    • The Backup File Is Encrypted: Sensitive messages should be encrypted for additional protection.

    Advantages of Backing Up Text Messages to a Computer

    • Data Safety Is Ensured: Messages are kept permanently safe.
    • Quick Restoration Is Possible: Messages can be easily restored on a new phone or after accidental deletion.
    • Records Are Organized: Personal and professional messages are systematically stored.

    Backing up Android text messages is an easy and crucial process. These steps ensure that important conversations are kept secure and accessible. Regular backups should be started today to avoid future risks!

  • How to Back Up Android SMS to Computer?

    How to Back Up Android SMS to Computer?

    To ensure the safety of important SMS messages, they can be backed up on a computer. This prevents accidental deletion or loss of messages in case of a phone malfunction. A step-by-step guide is provided below on how Android SMS can be backed up to a computer.

    Why Should SMS Be Backed Up to a Computer?

    • Data Loss Is Prevented: If messages are deleted or the phone is damaged, the data remains secure.
    • Phone Storage Is Freed Up: After backup, old messages can be deleted to save space.
    • Phone Switching Is Simplified: SMS can easily be transferred to a new phone.
    • Records Are Kept Safely: Important business or personal messages can always be accessed.

    Methods to Back Up Android SMS to a Computer

    Method 1: SMS Backup & Restore App Is Used

    1. The App Is Downloaded: The “SMS Backup & Restore” app must be installed from the Google Play Store.
    2. The App Is Opened: The app should be launched, and required permissions granted.
    3. Backup Is Created:
      • The “Set Up a Backup” option must be tapped.
      • “Messages” should be selected as the data type.
      • Google Drive, Dropbox, or local storage can be chosen as the backup location.
    4. Backup Is Transferred to the Computer:
      • If the backup is saved locally, the phone should be connected to the computer using a USB cable.
      • The backup file must then be copied to the computer.

    Method 2: Google Account Is Used

    1. SMS Messages Are Synced to Google Account:
      • “Settings” > “Google” > “Backup” must be accessed, and the “SMS Messages” option enabled.
      • The backup process must be completed.
    2. Google Drive Is Accessed:
      • Google Drive should be opened on the computer, and the synced backup file downloaded.

    Method 3: Third-Party Software Is Used

    1. Android Data Backup Software Is Installed: Tools like “Droid Transfer” or “Mobikin Assistant for Android” must be downloaded and installed on the computer.
    2. The Phone Is Connected: The phone should be connected to the software via USB cable or Wi-Fi.
    3. SMS Messages Are Backed Up: The SMS backup option within the software should be used to save messages to the computer.

    Tips to Keep SMS Backups Safe

    • Backup Files Are Stored in Secure Locations: The backup file must be saved in a secure folder or on an external drive.
    • Regular Backups Are Taken: Backups of messages should be created at regular intervals.
    • Encryption Is Used: Sensitive messages should be encrypted for added security.

    Backing up SMS messages is an effective way to safeguard important data. These methods ensure that SMS backups are created and stored securely. Regular backups should be maintained, and files should always be kept in safe locations.

  • How to Delete Secure Folder on Android Without Password?

    How to Delete Secure Folder on Android Without Password?

    The Secure Folder is a feature on Android devices designed to protect personal files and apps. If the password or PIN is forgotten and deletion is required, the process might appear challenging. A step-by-step guide is provided here for clarity and ease.

    Why Should the Secure Folder Be Deleted Without Password?

    • Access Issues: When the password is forgotten, access to the Secure Folder is no longer possible.
    • Freeing Up Space: Unnecessary storage occupied by files in the Secure Folder can be released.
    • Device Reset or Transfer: Deleting the Secure Folder becomes essential during device reset or transfer to another user.

    Steps to Delete Secure Folder Without Password

    Method 1: Samsung Account Is Used

    • Secure Folder Settings Are Opened: “Settings” > “Biometrics and Security” > “Secure Folder” must be accessed.
    • Forgot Password Option Is Selected: The “Forgot Password” option should be tapped.
    • Samsung Account Credentials Are Entered: Login details for the Samsung account must be provided to regain access.
    • Secure Folder Is Deleted: Once access is restored, “More Options” > “Delete Secure Folder” should be selected.

    Note: This method will only work if the Secure Folder has been linked to a Samsung account.

    Method 2: Secure Folder Data Is Cleared

    • Settings Are Opened: The phone’s “Settings” app should be accessed.
    • Apps Section Is Navigated To: “Apps” or “Applications” must be selected.
    • Secure Folder Is Found: The Secure Folder should be located and selected.
    • Data Is Cleared: The “Storage” section must be opened, and the “Clear Data” option selected.
    • Phone Is Restarted: After the restart, the Secure Folder will be reset.

    Warning: All data within the Secure Folder will be permanently deleted with this method.

    Method 3: Factory Reset Is Performed

    • Data Is Backed Up: Important data on the phone should be backed up before resetting.
    • Reset Options Are Accessed: “Settings” > “System” > “Reset Options” must be selected.
    • Factory Reset Is Chosen: “Erase All Data” should be tapped, and the password entered to confirm.
    • Secure Folder Is Deleted: The Secure Folder and its contents will be removed after the reset.

    Note: This is a drastic measure and should only be taken when no other options are effective.

    Precautions to Avoid Secure Folder Issues in the Future

    • A Memorable Password Is Used: A password that can be easily recalled should be set.
    • Secure Folder Is Linked to Samsung Account: The Secure Folder should be synced with a Samsung account for easier recovery.
    • Backup of Secure Folder Data Is Performed: Regular backups of Secure Folder files should be maintained.
    • Biometric Access Is Enabled: Biometric login should be enabled alongside a password for easier access.

    Advantages and Disadvantages of Secure Folder Deletion

    Advantages

    • Storage Is Regained: Extra storage space is freed up.
    • Device Reset Is Made Simpler: Deleting the Secure Folder facilitates phone transfer or reset.

    Disadvantages

    • Permanent Data Loss: Files within the Secure Folder may be lost permanently if deleted without a password.
    • No Recovery Option: Recovery of files becomes impossible without a backup.

    It is possible for the Secure Folder to be deleted without a password, but the steps must be carefully followed. Each method should be understood and selected based on the specific situation. To prevent future issues, a strong, memorable password should be set, and the Samsung account must be linked to the Secure Folder.

  • How to See If Your Phone Is Hacked on Android?

    How to See If Your Phone Is Hacked on Android?

    If it is suspected that your Android phone has been hacked, it can be checked by following a few simple steps. By acting quickly, data can be secured, and the impact of the hack can be minimized.

    Why Should It Be Checked If an Android Phone Is Hacked?

    • Protection of Personal Data: Passwords, bank details, and private photos could be accessed by hackers.
    • Avoidance of Unwanted Charges: Unexpected bills or subscriptions might be caused by a hacked phone.
    • Maintenance of Phone Performance: Hidden processes could slow down the phone.
    • Ensuring Network Security: Other connected devices might be put at risk if the phone is hacked.

    Signs That an Android Phone Might Be Hacked

    • Battery Is Draining Fast: Unusual battery consumption might indicate malware running in the background.
    • Phone Is Overheating: Overheating without heavy usage could be caused by hacking.
    • Unknown Apps Are Installed: Apps that were not installed by the user could be signs of hacking.
    • Data Usage Is High: High data consumption might be due to malware.
    • Random Pop-Up Ads Appear: Malicious software could be causing ads to display outside apps.
    • Unsent Messages or Calls Are Found: Messages or calls not made by the user could indicate hacking.
    • Settings Have Been Changed: Passwords or accounts might be altered without the user’s knowledge.
    • Phone Has Become Very Slow: Malicious software could be responsible for a sudden drop in phone performance.

    Steps to Check If an Android Phone Is Hacked

    Step 1: Battery Usage Is Checked

    The “Settings” > “Battery” menu should be accessed, and the battery usage details must be reviewed. If an unknown app is using too much battery, malware might be present.

    Step 2: Installed Apps Are Reviewed

    The list of installed apps should be checked by navigating to “Settings” > “Apps.” Unknown apps must be uninstalled.

    Step 3: Data Usage Is Monitored

    The “Settings” > “Network & Internet” > “Data Usage” menu must be reviewed to identify apps consuming high data.

    Step 4: An Antivirus App Is Installed

    A trusted antivirus app such as Avast or McAfee should be downloaded, and the phone should be scanned.

    Step 5: Messages and Call Log Are Checked

    The SMS and call history must be reviewed for any messages or calls not made by the user.

    Step 6: Pop-Up Ads Are Blocked

    Frequent pop-ups should be addressed by enabling “Block Pop-Ups” in the browser settings or installing an ad-blocker.

    Step 7: A Factory Reset Is Performed (If Necessary)

    If the issue persists, a factory reset must be performed after data is backed up. “Settings” > “System” > “Reset Options” > “Erase All Data” should be selected.

    How to Protect an Android Phone from Getting Hacked

    • Strong Passwords Are Used: Easy passwords should be avoided, and 2-step verification must be enabled.
    • Unknown Apps Are Avoided: Only trusted apps from the Google Play Store should be installed.
    • Public Wi-Fi Is Avoided: Sensitive information must not be shared on public Wi-Fi networks.
    • Software Is Updated: The phone’s software and apps should always be kept up-to-date.
    • Permissions Are Reviewed: Unnecessary permissions must not be granted to apps.

    If it is suspected that the phone has been hacked, these steps should be followed to identify and resolve the issue. For prevention, strong passwords, updated apps, and vigilance for suspicious activities are recommended.

  • How to Find MAC Address on Android?

    How to Find MAC Address on Android?

    A MAC (Media Access Control) address is used to uniquely identify a device’s network hardware. If the MAC address of an Android device needs to be located for troubleshooting or connecting to specific networks, a simple process can be followed.

    Why Should the MAC Address Be Found on Android?

    • Network Issues Are Troubleshot: The MAC address is provided to network technicians for resolving connectivity problems.
    • Network Access Is Secured: Wi-Fi networks are restricted to authorized devices by checking their MAC addresses.
    • Devices Are Identified: Monitoring and tracking are made possible using the MAC address.
    • Parental Controls Are Applied: Internet access is restricted based on the MAC address.

    Steps to Find MAC Address on Android

    Method 1: Through Settings

    1. The “Settings” app is opened on the Android phone.
    2. The “About Phone” or “About Device” option is tapped.
    3. The “Status” or “Hardware Information” option is selected.
    4. The “Wi-Fi MAC Address” or “Wireless MAC Address” is located.

    Method 2: Check Wi-Fi Settings

    1. The “Network & Internet” section is accessed through the “Settings” app.
    2. The connected Wi-Fi network is tapped.
    3. The MAC address is found in the “Advanced” settings or “Details” section.

    Method 3: Use Command with Developer Options

    1. Developer Options are enabled by tapping “Build Number” seven times under “About Phone.”
    2. The “Networking” section in Developer Options is accessed.
    3. The MAC address is displayed there.

    Method 4: Use a Third-Party App

    1. A network information app, such as “Network Info II,” is downloaded from the Play Store.
    2. Necessary permissions are granted when the app is opened.
    3. The MAC address is shown in the app’s Wi-Fi details section.

    Click here to read more: How to Find EID Number on Android

    Advantages and Disadvantages of Finding MAC Address

    Advantages:

    • Improved Security Is Ensured: Specific devices are allowed access to the network.
    • Network Issues Are Resolved: The MAC address simplifies troubleshooting.
    • Devices Are Monitored and Managed: Connected devices are easily tracked.

    Disadvantages:

    • Potential Misuse Can Occur: Spoofing or unauthorized access may be attempted if the MAC address is exposed.
    • Challenges Are Faced: Older Android versions might make locating the MAC address harder.
    • Dynamic Addressing Causes Confusion: Temporary MAC addresses on newer devices complicate identification.
  • How to Block YouTube Ads on Android?

    How to Block YouTube Ads on Android?

    YouTube ads are considered bothersome by many users, especially when uninterrupted video playback is desired. Solutions to block YouTube ads on Android devices can be explored, and this guide provides some effective methods to achieve an ad-free experience.

    Why Should You Block YouTube Ads on Android?

    • Uninterrupted Viewing Experience:
      Videos can be watched without interruptions caused by ads.
    • Time-Saving:
      Time spent skipping or waiting for ads to finish is reduced.
    • Data Conservation:
      Data usage caused by ads is minimized, especially for limited data plans.
    • Better Focus:
      Ads are prevented from disrupting focus while watching educational or work-related content.

    Methods to Block YouTube Ads on Android

    Method 1: YouTube Premium Subscription

    • Subscription to YouTube Premium:
      A subscription to YouTube Premium ensures that ads are removed.
    • Ad-Free Videos:
      After subscribing, videos on the YouTube app are displayed without interruptions.

    Advantages:

    • 100% legal and reliable.
    • Features such as offline downloads and background playback are included.

    Method 2: Using an Ad-Blocker App

    • Installation of an Ad-Blocker:
      Trusted ad-blocker apps, such as AdGuard or Blokada, can be downloaded.
    • Activation of Ad-Blocking:
      Ad-blocking features must be enabled within the app settings.
    • Ad-Free YouTube Experience:
      Ads on YouTube videos are blocked while using the app.

    Note: The use of ad-blocker apps may affect certain features and requires trusting third-party applications.


    Method 3: Using YouTube Vanced (Third-Party App)

    • Downloading YouTube Vanced:
      YouTube Vanced APK can be downloaded from its official website.
    • Installation of the App:
      The “Unknown Sources” option must be enabled before the APK file is installed.
    • Ad-Free Videos:
      YouTube videos are played without ads, and additional features such as background playback and themes are provided.

    Warning: YouTube Vanced is a third-party app; security and privacy should be considered.

    Method 4: Using a Browser with a Built-In Ad Blocker

    • Installation of Ad-Blocking Browsers:
      Browsers like Brave, with built-in ad-blocking capabilities, can be downloaded.
    • Opening YouTube on the Browser:
      YouTube is accessed through the browser instead of the app.
    • Ad-Free Video Playback:
      The ad-blocking feature ensures videos are played without interruptions.

    Advantages:

    • A secure browsing experience is provided.
    • Additional apps are not required.

    Method 5: Adjusting DNS Settings

    • Changing DNS Settings:
      Ad-blocking DNS services such as AdGuard DNS or Cloudflare DNS can be used.
    • Network Configuration:
      The DNS settings for the connected network are modified by navigating to “Settings” > “Wi-Fi”.
    • DNS Address Entry:
      Addresses such as 176.103.130.130 and 176.103.130.131 (AdGuard DNS) are entered.
    • Device Restart:
      The device is restarted after applying the new DNS settings.

    Note: DNS-based ad-blocking may face restrictions in certain regions.

    Advantages and Disadvantages of Blocking YouTube Ads

    Advantages:

    • Ad-Free Experience:
      Videos can be watched without interruptions caused by ads.
    • Time and Data Conservation:
      Skipping ads is avoided, saving both time and data.
    • Improved Focus:
      Educational and work-related videos are viewed without distractions.

    Disadvantages:

    • Risks with Third-Party Apps:
      Apps like YouTube Vanced must be obtained from trusted sources to avoid malware.
    • Impact on YouTube Creators:
      Ad revenue for content creators is reduced when ads are blocked.
    • Legal and Ethical Concerns:
      Blocking ads without an official subscription may violate YouTube’s policies.

    Ad-blocking solutions on Android devices are available through multiple methods. The official and ethical choice is YouTube Premium, but alternatives such as ad-blocker apps, browsers, and DNS adjustments are also effective for those seeking free options.

  • How to Find EID Number on Android?

    How to Find EID Number on Android?

    The EID number (Electronic Identification Number) is used in some countries for mobile networks and government services. If your EID number needs to be found on your Android phone, it can be easily done by following this process. This number may be required for important services such as network registration, government services, or verification purposes.

    Why Should You Find EID Number on Android?

    • Required for Services:
      The EID number is verified for services like SIM registration and government schemes, making it an important number.
    • For Network Configuration:
      The EID number is also used for mobile network configuration and troubleshooting.
    • Verification Purposes:
      The EID number can be used for identity verification in services such as bank accounts, government schemes, and other official services.
    • Track Your Mobile Number:
      If an issue is faced with your mobile number, the EID number can help resolve it.

    Steps to Find EID Number on Android

    Method 1: Check in SIM Card Settings

    • Open Settings:
      The “Settings” app on your Android phone should be opened.
    • Go to About Phone:
      The “About Phone” option should be tapped in the Settings menu.
    • Find SIM Status:
      The “Status” or “SIM Status” option should be selected in the About Phone section.
    • Look for EID Number:
      The EID number will be listed under SIM Status or the “EID” option.
    • Copy EID Number:
      The EID number can be easily copied or noted down for future use.

    Click here to read more: How to Find MAC Address on Android

    Method 2: Check Using USSD Code

    • Dial USSD Code:
      The EID number can be checked by dialing a USSD code in some countries. This code varies by network provider, such as ##4636## or a specific code provided by the network provider.
    • Select Phone Information:
      After dialing the USSD code, the “Phone Information” or “Status” option should be selected where the EID number can be found.

    Method 3: Contact Customer Care

    • Call Customer Care:
      If the EID number cannot be found, a call can be made to the mobile network provider’s customer care number.
    • Ask for EID Number:
      The EID number should be requested from the customer care representative. Identity verification may be required, where the mobile number and account details may need to be provided.

    Method 4: Use Network Provider’s App

    • Install Network Provider’s App:
      If the network provider has an official app (such as Airtel, Jio, or Vodafone), it should be installed.
    • Log In to Your Account:
      The app should be logged into using account credentials.
    • Check Profile or Settings:
      In the account settings, the EID number can be found under “SIM Card” or “Device Information.”

    Method 5: Check the SIM Card Packaging

    • SIM Card Packaging:
      If the SIM card packaging has been saved, the EID number may be written on it.
    • Check the PUK/ICCID Number:
      The EID number may also be present along with the PUK or ICCID number on the SIM card packaging.

    Advantages and Disadvantages of Finding EID Number on Android

    Advantages:

    • Access to Important Services:
      By finding the EID number, access to government and network-related services can be easily gained.
    • Secure Your Identity:
      The EID number can be used to verify identity, which is important for phone and mobile services.
    • Convenient for Mobile Configuration:
      The EID number may be required for making changes to mobile network configuration.

    Disadvantages:

    • Not Always Visible:
      The EID number is not always easily visible on some Android devices, requiring multiple methods to be tried.
    • Requires Network-Specific Settings:
      To find the EID number, network provider-specific settings and codes need to be used, which may not be convenient for all users.
    • Privacy Concerns:
      When sharing the EID number, privacy should be considered as it is an important identification number.

    Finding the EID number on your Android phone is quite simple if the correct steps are followed. The Eid number can be easily found using SIM settings, USSD codes, customer care services, or network provider apps.

  • How to Save SMS Messages from Android to PC

    How to Save SMS Messages from Android to PC

    If you want to save your important SMS messages from your Android phone to PC, the process is simple and straightforward. It’s essential to secure your messages, whether personal or business-related. Let’s explore how to save SMS messages from your Android phone to your PC.

    Why Should You Save SMS Messages from Android to PC?

    • Backup Important Messages:
      If you have important SMS messages that you may need in the future, saving them to your PC ensures a reliable backup.
    • Free Up Phone Storage:
      If your phone has too many SMS messages and you’re running low on space, transferring them to your PC can free up storage.
    • Organize Messages:
      Managing SMS messages on a PC is far easier than on a phone, allowing you to organize and search your messages more efficiently.
    • Print SMS for Legal or Official Use:
      Saving SMS messages on your PC makes it convenient to print them for legal or official purposes.

    Steps to Save SMS Messages from Android to PC

    Method 1: Using SMS Backup & Restore App

    • Install SMS Backup & Restore:
      Download and install the SMS Backup & Restore app from the Google Play Store.
    • Backup SMS:
      Open the app and select the “Backup” option. You can back up your SMS to Google Drive, Dropbox, or email.
    • Access Backup on PC:
      If backed up to cloud storage (Google Drive, Dropbox), you can download the SMS backup by accessing the cloud storage on your PC.
    • Restore SMS to PC:
      To view the messages directly on your PC, open the backup file with SMS reader software or a viewer.

    Method 2: Using Email to Save SMS

    • Forward SMS to Email:
      Manually forward specific important SMS messages to your email address.
    • Access Email on PC:
      Once the SMS messages appear in your email inbox, access and save them on your PC.
    • Download Attachments:
      If you’ve sent SMS as attachments to your email, download them easily.

    Method 3: Using Third-Party Software (e.g., dr.fone, Mobikin)

    • Install Third-Party Software:
      Install third-party software like dr.fone or Mobikin on your PC.
    • Connect Android to PC:
      Use a USB cable to connect your Android phone to your PC and launch the software.
    • Choose SMS Option:
      Select the “SMS” or “Messages” option within the software.
    • Transfer SMS to PC:
      The software will transfer your SMS messages to your PC, allowing you to read, save, and organize them.

    Method 4: Using Android File Transfer and ADB (Advanced Method)

    • Enable USB Debugging:
      In your phone’s “Settings” > “Developer Options,” enable “USB Debugging.”
    • Connect Android to PC:
      Use a USB cable to connect your Android phone to your PC.
    • Use ADB Commands:
      Advanced users can extract SMS messages using ADB (Android Debug Bridge) commands via the command line interface.
    • Save SMS to PC:
      Save the extracted SMS data on your PC and view it in the required format.

    Method 5: Using Google Drive (for Backup)

    • Enable Backup on Android:
      Enable SMS backup by navigating to “Settings” > “Google” > “Backup.”
    • Access Google Drive on PC:
      Once the SMS is backed up, access Google Drive on your PC and download the SMS messages.
    • View Messages from Backup:
      Use specific viewer software to view your messages from the Google Drive backup.

    Advantages and Disadvantages of Saving SMS Messages from Android to PC

    Advantages:

    • Safe Backup:
      Storing your SMS messages on your PC ensures they are securely backed up for future access.
    • Organize and Search Easily:
      Organizing and searching for SMS messages on a PC is far simpler than doing it on your phone.
    • Free Up Storage on Phone:
      If your phone’s storage is full, transferring SMS messages to your PC can free up valuable space.
    • Print for Legal or Official Use:
      You can print SMS messages stored on your PC for documentation or legal purposes.

    Disadvantages:

    • Requires Third-Party Apps:
      Some methods involve using third-party apps or software, which need to be trusted and secure.
    • Manual Process:
      Manually forwarding SMS or backing up messages can be time-consuming.
    • Complex Methods for Advanced Users:
      Using ADB commands or third-party software can be complicated for non-technical users.

    Saving SMS messages from your Android phone to your PC can be simple when using the right tools and methods. Securely store your important messages and access them easily for future reference.